Replacing a graphics card is simple – it is the most universal module in a computer that can be placed in any system and will work somehow. It is much more difficult to select a card that matches the power of all components, which requires a complete system analysis.
Replacing a Graphics Card with a More Powerful One
If you are building a new system, it is quite easy to choose components from modern parts. Modern processors handle games without problems, which means the graphics card is up to the task. To avoid dealing with frequencies, it is very simple to choose a graphics card in a new system based on price. Multiply the cost of the processor by 1.6 or 1.8 to get the cost of the graphics card. This calculation will always allow you to choose a card of optimal power.
If you have an old system, you need to assess how relevant it is, as replacing the graphics card implies that the other components can handle the loads you may give them.
Testing an Old Computer
Before starting any tests, the computer needs to be cleaned. Various methods involve complete or partial disassembly, during which you can see problems that can lead to serious consequences. The most common computer malfunction is swollen capacitors in the power supply. The computer will continue to start, but in a critical situation, this can lead to the complete failure of the entire system.
Computer cleaning options:
- Compressed air. Preferably in a can, but you can use a medical bulb (just get a big one, it can generate more pressure). Compressed air at 6-8 Bar pressure can blow out dust in the most hard-to-reach places. In cans with compressed air, a mixture of propane, butane, and isobutane with additives is actually used, which are easier to compress. Air itself does not compress well. The process is very dusty; essentially, you are blowing all the dust out of the case. Therefore, it is better to carry out all cleaning operations outside.
- Brush and vacuum cleaner. Use a brush to sweep off the dust, and the vacuum cleaner sucks it up. You can also use just a vacuum cleaner, but it may not be powerful enough to suck up the adhered layer of dust. Dust collects in the computer due to static electricity and magnetic radiation, which are constantly generated by the boards. Therefore, the bottom layer of dust may adhere quite strongly to the surface.
- Damp cloth and brush. As you understand, if water gets on the board, the oxidation process will begin, which will kill your most expensive and advanced board within a few weeks or months. Therefore, in the most dusty places, you can only use a cloth moistened with alcohol or a special solution for cleaning electronics. There are many capacitors and transistors on the motherboard, graphics card, and power supply; these small barrels protrude significantly above the surface of the board, and to get between them, you need a brush or compressed air. A cloth moistened with alcohol can only be used to remove heavy dirt on the surface.
Cleaning the Computer
All modules need to be removed and all cables disconnected. The only exception is cleaning with a compressor.
To disassemble the computer, you will need some tools and consumables, as they cannot be reinstalled:
- A small Phillips screwdriver. Useful for removing the graphics card, power supply, unscrewing the power supply cover, and the heatsink from the card.
- Thermal paste. Needed when reinstalling the heatsinks. It is best not to skimp on it; it is a crucial element in the cooling system.
- Thermal pads. They are cheap, sold either pre-cut 15x15 or as a continuous mat. It is better to buy continuous ones and then cut them, as not all graphics card modules are 15x15 in size.
Computer disassembly:
- Turn off the computer and disconnect all cables from the outside of the case.
- Remove the left side panel.
- Unscrew the supporting bar for PCI devices and remove the graphics card.
- Then disconnect all cables connected to the motherboard.
- Remove the heatsink from the processor.
- Unscrew and remove the power supply from the case.
When cleaning, be sure to replace the thermal paste on the processor after wiping off the old one with alcohol. For better cleaning, be sure to remove the power supply cover and clean the board inside and the fan.
You need to remove the heatsink from your old graphics card and also replace the thermal paste. Usually, this is quite a simple procedure. But if you haven't replaced the thermal paste for a long time, it may have become very hard and stuck to the crystal. Remove the heatsink as carefully as possible; any chip on the crystal can render the entire card inoperable and irreparable.
The shiny, polished crystal is silicon. This material is ideal for building microprocessors of any configuration on it. It is extracted from sand and purified to a purity of 99.9999999%.
Clean the old graphics card using a cloth, alcohol, and a plastic card. Do not use metal tools; their hardness is enough to scratch or chip the surface. Plastic and wood are safe options, as they are soft enough.
Note that plastic modules on the board are cooled not through thermal paste but using soft silicone thermal pads. They cannot be reused. It is best not to skimp on these thermal pads and thermal paste; at best, you will have to replace them in six months, and at worst, one of the modules will burn out.

After disassembly, reassemble in any order. Small assembly tips:
- Connect the coolers and power supply to the motherboard before installing the heatsink on the processor and inserting the graphics card. Installing the heatsink and card should be the last steps, as it will be much more convenient.
- After cleaning the dust, reinstall Windows, be sure to install Win 10 x64, even if you had a different system before. This will allow you to accurately assess the computer's performance. It is possible that after these manipulations, the PC's performance will significantly increase.
System Performance Testing
There are many synthetic tests on the internet that won't tell you anything. The best way to test a computer is through games. Install several modern games that you would like to play. Run them and analyze the behavior of your hardware.
Replacing the graphics card will only help with low FPS. If the processor is not fully loaded, the RAM is idle, and the game looks like a slideshow – in this case, replacing the graphics card will indeed help.
How to Choose a Graphics Card
Compatibility
If you install an incompatible model, it will work, but the efficiency of such a combination will be low. If the processor is significantly more powerful, the card will limit its potential, and if the card is more powerful, you simply won't be able to use its full power because other components will be bottlenecks.
To upgrade the system to modern standards, you need to get a graphics card from current series. Below you will find a table matching all modern NVIDIA graphics cards to different processors. It is physically impossible to describe each old processor model, so they are grouped by the most important indicators – frequency, cores, and threads.
- "Not suitable" can mean either that the card is too weak for such a processor or that it is not productive enough.
- "Can be better" means the graphics card is somewhat weak for the processor, but not by much. It can be used, but it's not the limit for your system.
- "Normal" means the graphics card's power slightly exceeds the processor's capabilities. It can be used and is highly recommended, a great foundation for a new computer.
- "Ideal" – the name speaks for itself. The best combination possible.
| 2 cores, 4 threads, 2 GHz+ | 2 cores, 4 threads, 3 GHz+ | 4 cores, 4 threads, 2 GHz+ | 4 cores, 8 threads, 3 GHz+ | 6 cores, 6 threads | 6 cores, 12 threads | 8 cores | |
|---|---|---|---|---|---|---|---|
| RTX 3090 | Not suitable | Not suitable | Not suitable | Not suitable | Not suitable | Not suitable | Normal |
| RTX 3080 | Not suitable | Not suitable | Not suitable | Not suitable | Not suitable | Normal | Ideal |
| RTX 3070 | Not suitable | Not suitable | Not suitable | Not suitable | Normal | Ideal | Ideal |
| RTX 3060 Ti | Not suitable | Not suitable | Not suitable | Normal | Ideal | Ideal | Can be better |
| RTX 2080 Ti | Not suitable | Not suitable | Not suitable | Not suitable | Normal | Ideal | Ideal |
| RTX 2080 SUPER | Not suitable | Not suitable | Not suitable | Not suitable | Ideal | Ideal | Ideal |
| RTX 2080 | Not suitable | Not suitable | Not suitable | Normal | Ideal | Ideal | Can be better |
| RTX 2070 SUPER | Not suitable | Not suitable | Normal | Ideal | Ideal | Ideal | Not suitable |
| RTX 2070 | Not suitable | Not suitable | Normal | Ideal | Can be better | Can be better | Not suitable |
| RTX 2060 SUPER | Not suitable | Normal | Ideal | Ideal | Can be better | Not suitable | Not suitable |
| RTX 2060 | Not suitable | Ideal | Ideal | Can be better | Can be better | Not suitable | Not suitable |
| GTX 1660 Ti | Not suitable | Ideal | Ideal | Can be better | Not suitable | Not suitable | Not suitable |
| GTX 1660 SUPER | Not suitable | Ideal | Ideal | Can be better | Not suitable | Not suitable | Not suitable |
| GTX 1080 | Not suitable | Not suitable | Not suitable | Normal | Ideal | Ideal | Can be better |
| GTX 1070 | Not suitable | Not suitable | Normal | Ideal | Can be better | Can be better | Not suitable |
| GTX 1060 6 Gb | Normal | Ideal | Ideal | Ideal | Not suitable | Not suitable | Not suitable |
| GTX 1060 3 Gb | Normal | Can be better | Can be better | Not suitable | Not suitable | Not suitable | Not suitable |
| GTX 1050 Ti | Ideal | Can be better | Not suitable | Not suitable | Not suitable | Not suitable | Not suitable |
Power Supply
The graphics card's specifications always indicate the amount of power consumed in Watts. Your power supply must meet these requirements. Note that the nominal power of the power supply is always higher than its actual capabilities, especially when it comes to prolonged loads, such as those in games.
For example, a 500-Watt power supply with an 80 PLUS Bronze certificate will only provide 425 Watts at full load. If your power supply is not certified, you should calculate its actual power by multiplying by a coefficient of 0.7. Note that there are other consumers in the system – and their total consumption should not exceed the actual power of the power supply.
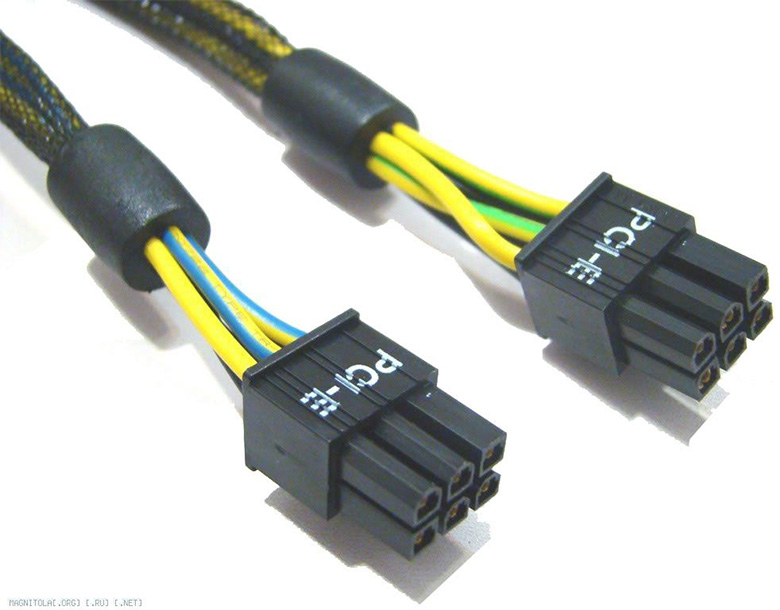
If your power supply meets these requirements but does not have the appropriate additional power connectors, do not worry, adapters can always be purchased. The main thing is that there is enough power.
Graphics Card Sizes
Due to the large number of modules and the constant race for board cooling efficiency, graphics cards are getting longer and longer. While their width remains unchanged within the standard case framework, their length is increasing. If you have a small case, this can be a problem. The board may simply rest against the 2.5" and 3.5" device rack, preventing you from inserting it into the motherboard.
Check the technical specifications of the chosen card and measure inside the case with a ruler to see if there is enough space. Measure the case at the level of the top PCI-E x16, as that is usually where the latest version slot is located.
The space on the left, where the monitor outputs are, will always be the same, as it is standardized in all graphics cards and PCI devices. But the right part is optional and can be modified by the manufacturer. Usually, premium gaming models are made larger to improve cooling.
Cooling
It is impossible to calculate this parameter very accurately, nor is it necessary. It is enough to ensure that your case is fully ventilated and has enough fans to supply the graphics card's heatsink with fresh air. The minimum is one 120mm fan at the front of the case to draw air in and another 90mm fan at the back to exhaust hot air.
Replacing the Graphics Card
Once you have determined that the chosen card meets all the parameters, you can proceed with the replacement. The first step is to turn off the computer and disconnect the power cable from the power supply to avoid electric shock.
What happens if you remove the card from a running PC?
In most cases, you will see a blue screen of death or an error indicating that the adapter is not available. In the worst case, you risk burning out the motherboard and graphics card. The risk is not worth it and it's better not to do it.
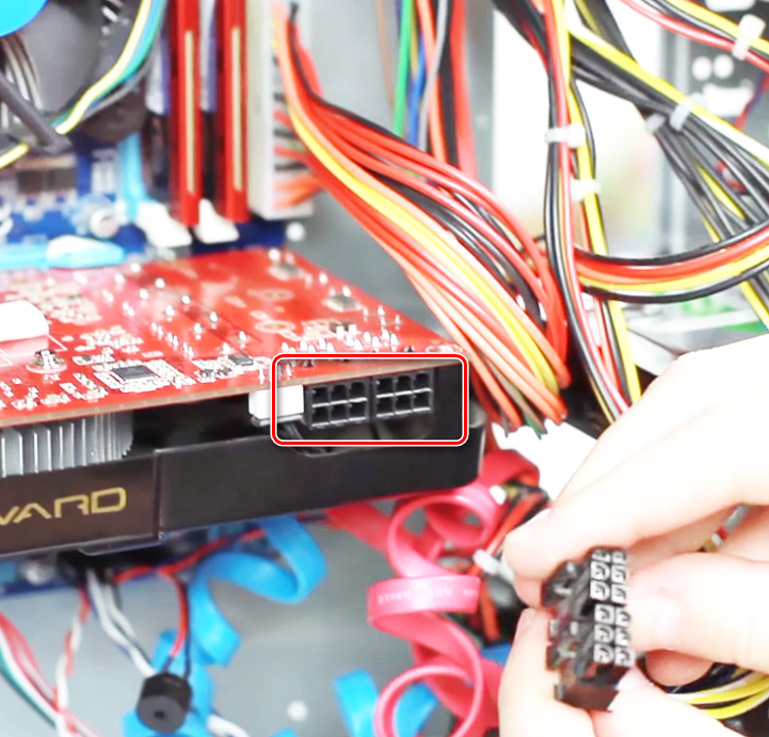
Disconnect the additional power from the graphics card if it is there. Be careful; there is a latch that needs to be released. Remember that the graphics card hangs on a thin piece of fiberglass, and the connector is a small piece of plastic. Do not pull the plug too hard, support the board with your hand, but do not squeeze the area around the heatsink to avoid crushing the crystal.
Disconnect the monitor, VR headset, and any other devices connected to the back of the graphics card.
VGA and DVI, regardless of versions, have two screws that screw into special nuts near the connector. These need to be unscrewed before removal, otherwise, you risk ripping out the connector and breaking the graphics card.
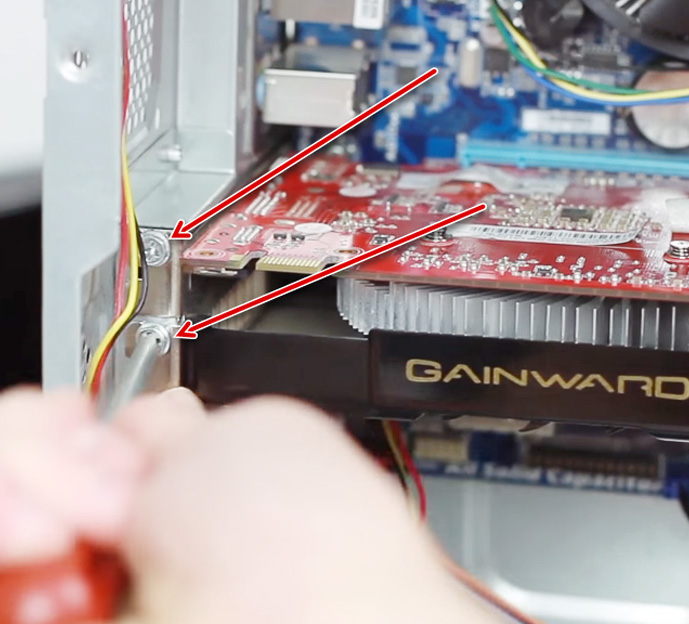
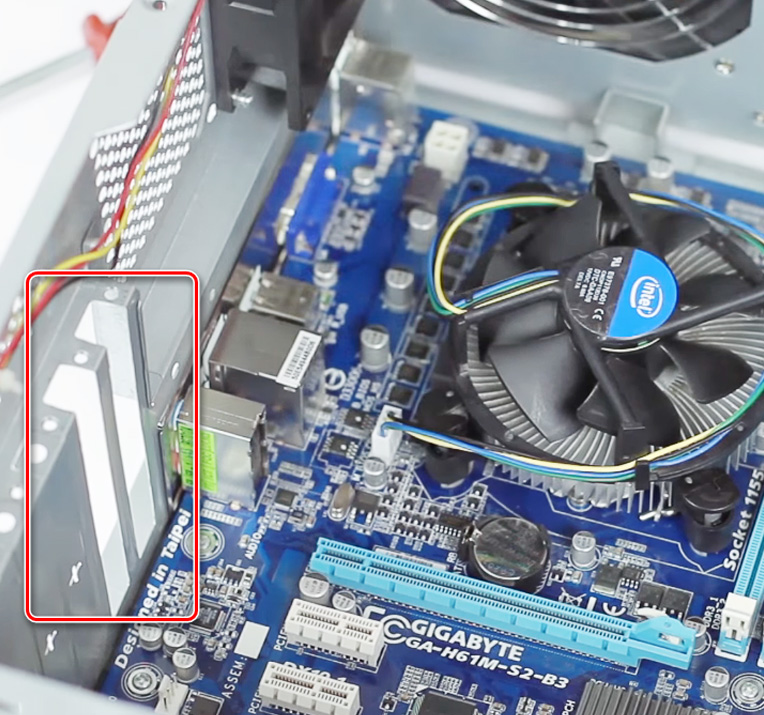
The next step is to remove the internal case fasteners. As mentioned earlier, the graphics card is quite heavy and wide, and needs support. The image shows the screws that need to be unscrewed. In some cases, there is a quick-release bracket, which is even easier to remove. After removing these fasteners, do not leave the card hanging, support it with your finger until it is completely disconnected.
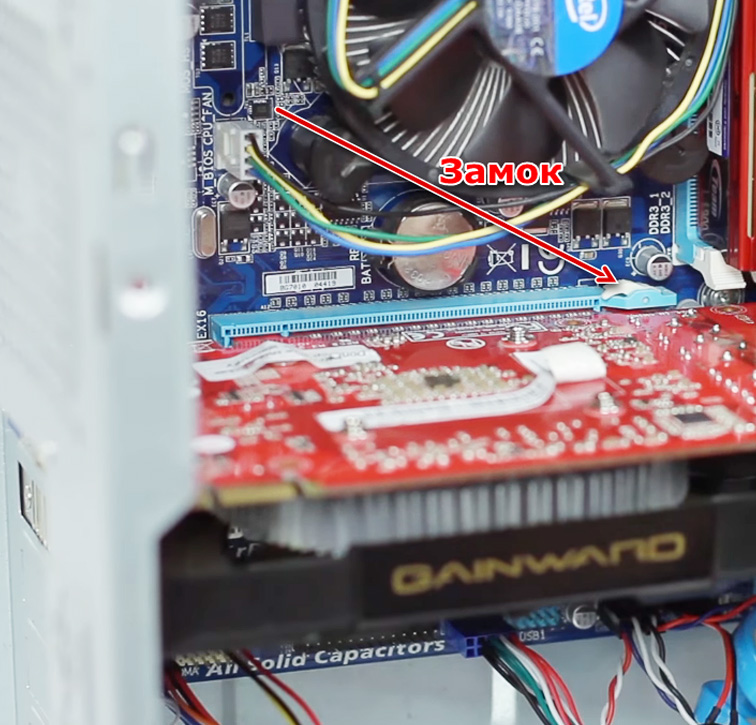
Note that the PCI-Express x16 slot has a lock that needs to be opened. The photo shows that this construction has a white lever that needs to be released. Some motherboards use a simple clamp where two plastic strips clamp this edge of the card, which need to be opened. Different manufacturers use different locks, it's not difficult to figure them out, just remember that without opening it, you won't be able to remove the graphics card, only pull it out once and for all.
Which Slot is the Graphics Card Installed In?
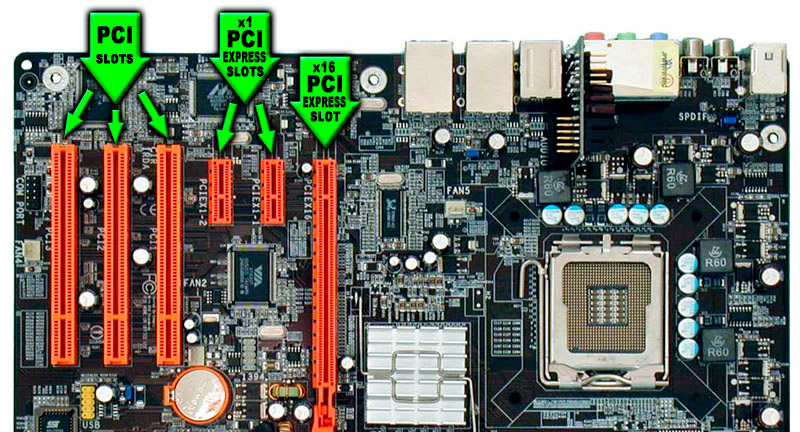
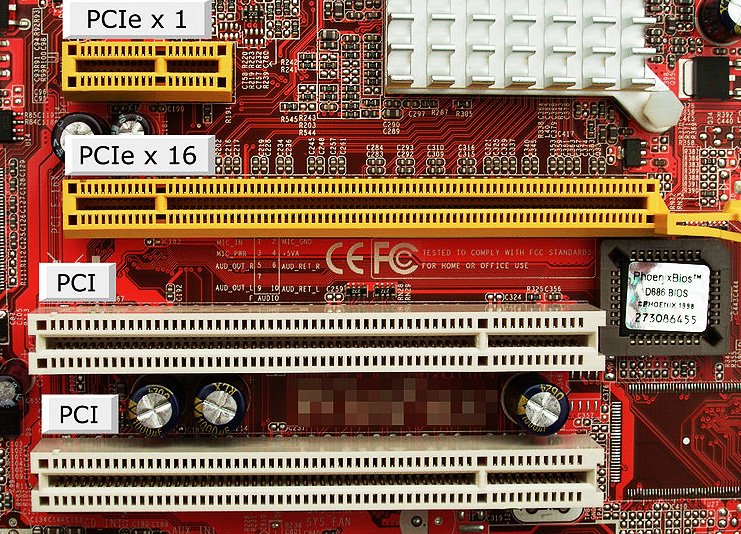
It is necessary to explain about the PCI slots, as at first glance, they are very similar. The photo shows all the main types of PCI slots used in modern motherboards. To avoid confusion, remember a simple rule – the graphics card is installed in a slot with a lock. As you can see, it is only present on PCI-E x16.
There is also the concept of a PCI-E version. Modern cards support versions 4.0 and 5.0. They are interchangeable – a card with PCI-E 4.0 support will work on version 3.0 and even 2.0, but the data transfer speed will be worse, affecting performance.
PCI-E x16 Slot Performance Table
| Per Lane | All 16 Lanes | |
|---|---|---|
| 1.0 | 250 MB/s | 4 GB/s |
| 2.0 | 500 MB/s | 8 GB/s |
| 3.0 | 984.6 MB/s | 16 GB/s |
| 4.0 | 1969 MB/s | 32 GB/s |
| 5.0 | 4096 MB/s | 64 GB/s |
| 6.0 | 8192 MB/s | 128 GB/s |
Version 6.0 is still in the planning stages, announced for 2021. Maybe in a year or two, we will see graphics cards that support such data transfer speeds, as well as motherboards for them. It can be predicted that initially, this will be the domain of the top devices for gamers.
Installing a New Graphics Card
Cards from all manufacturers are installed the same way, regardless of the card or chip manufacturer.
To install a new graphics card, you need to prepare the slot for it. On the back panel of the computer, there are blanks that allow the outputs of PCI devices. When closed, they prevent air loss and protect from dust. Some graphics cards occupy not just one slot, but two or even three. Fit the new card and push out the extra blanks.
If there are no connectors on the additional slot of the card, but only a grill for air, you also need to push out the slot, otherwise, it will harm cooling.
Install the new graphics card in place of the old one, following this procedure:
- Insert it into the PCI-E slot.
- Secure the board with screws so it does not hang on the connector.
- Connect additional power if provided.
- Connect the monitor, VR headset, projector, and any other devices that need to be connected to your graphics card.
- Done! Now connect the power cable to the computer and install the drivers.
How to Install a Second Graphics Card on a Computer
The process of installing a second card is no different from installing the first one. The only thing to consider is the presence of space on the motherboard and a second PCI-E x16 slot. If you plan to use them simultaneously on one monitor in synchronized mode, you need to use two compatible graphics cards and have a special bridge – SLI and NVLink for NVIDIA or Crossfire for AMD.
Connecting is very simple: plug in the graphics card – plug in the bridge and enjoy the ultra-high power boost of 1.5 times if we are talking about NVLink. Older versions of bridges will not achieve such performance levels.
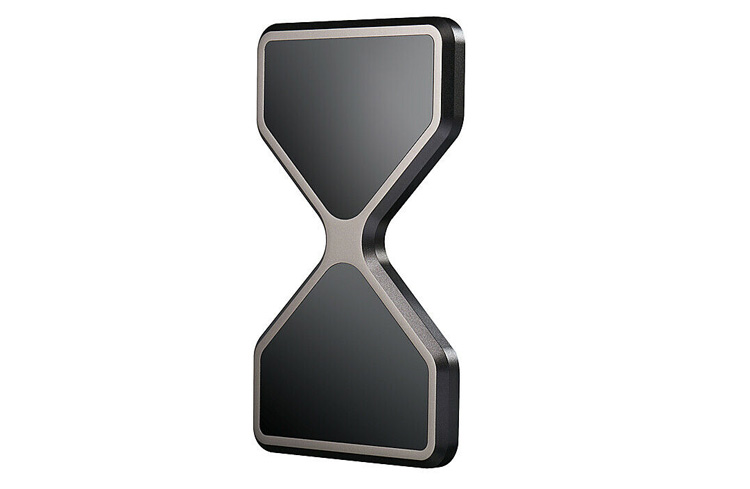
Original NVLink
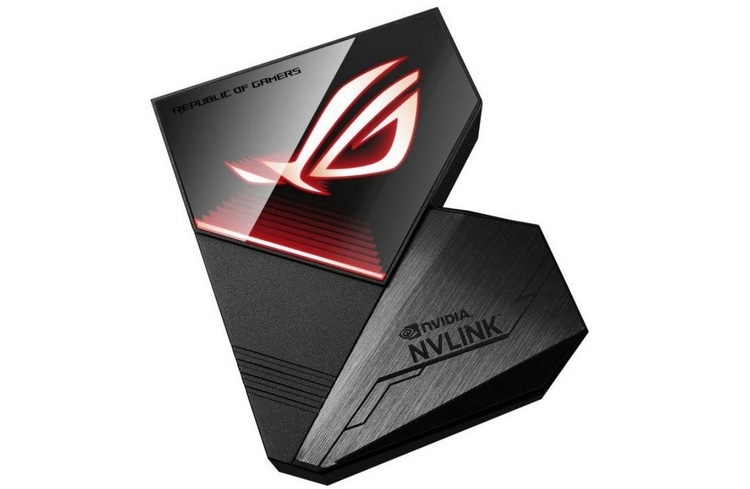
ASUS ROG Adaptation
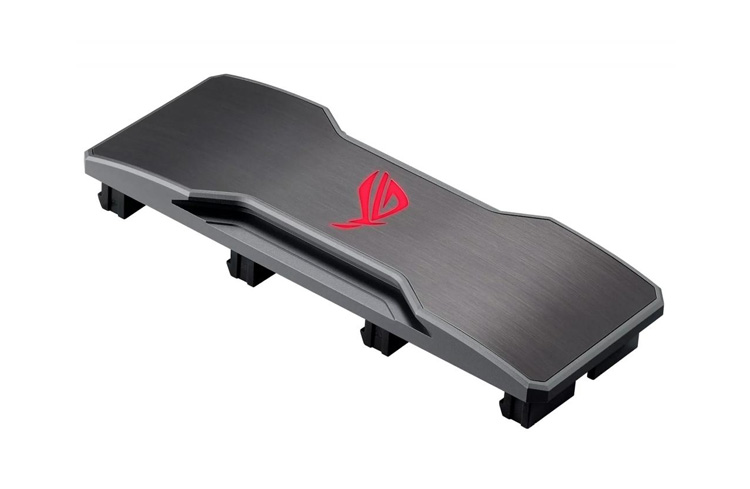
ASUS ROG SLI

Crossfire MSI
How to Install a Graphics Card Vertically
Side (vertical installation of the graphics card) – is one of the options for its placement. Let's consider the positive and negative sides.
- Most "Vertical GPU-Ready" cases do not support the installation of three-slot graphics cards, only two-slot ones.
- With an adapter, the graphics card will always work slower than without it. If the adapter (riser) is good, this difference will not be significant, but if it is bad, the card will noticeably weaken.
- Cooling is designed by engineers for horizontal installation. Vertical position moves the fans very close to the side glass, which hinders cooling.
The disadvantages of vertical installation can be mitigated if you seek help from the specialists at UPGRADE CENTER. You will get a machine with an impressive design and excellent performance.
Installing a Graphics Card in a Case with a Vertical Slot
These are usually non-standard cases, such as cube or cylindrical ones.
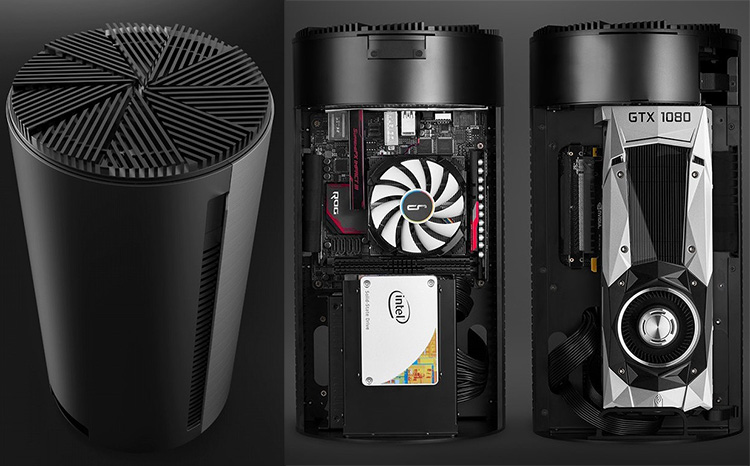
The installation is the same as described in the instructions above, except that before starting, you need to connect an extender to the PCI-E slot. There are no other features for this installation.
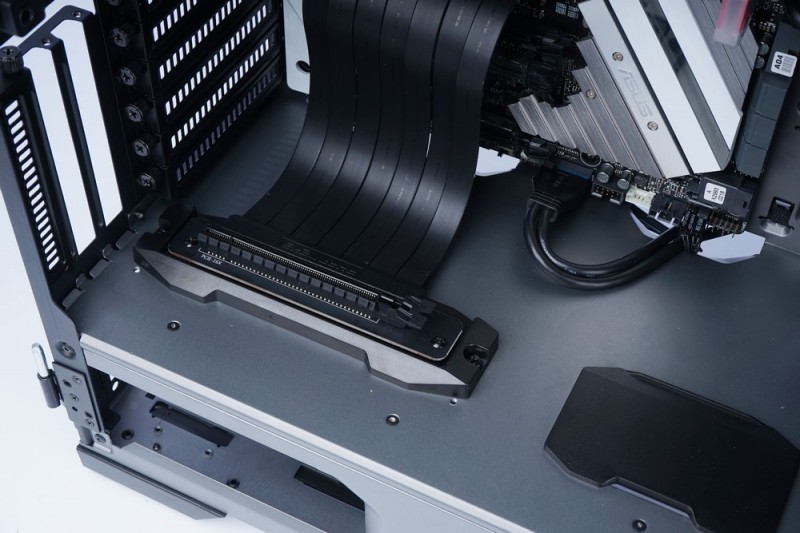
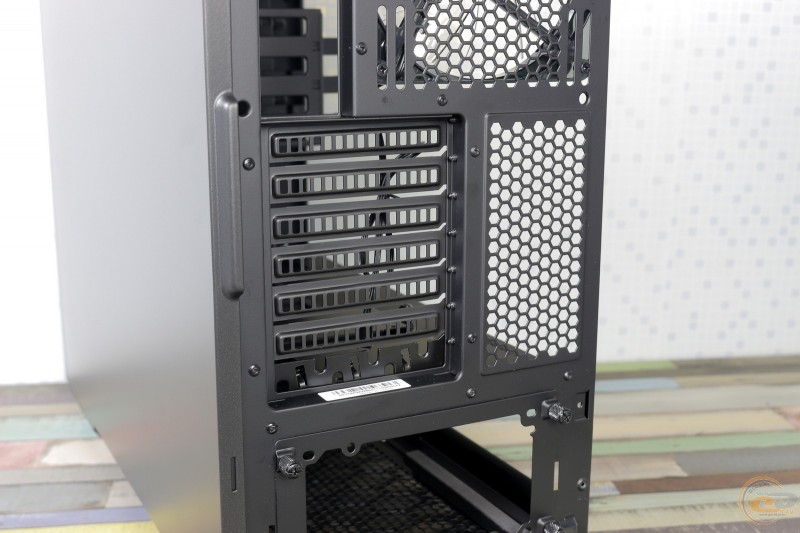
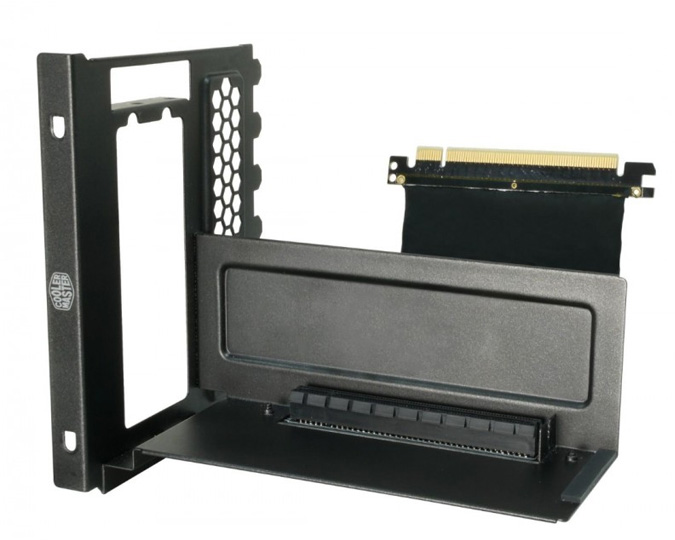
Installing a Graphics Card Vertically in a "Vertical GPU-Ready" Case
These cases do not come with an extender by default, only the option to attach one. The picture shows how it looks from the back. Note that there are no partitions between the expansion slots for PCI devices, allowing you to remove all of them and install the card vertically.
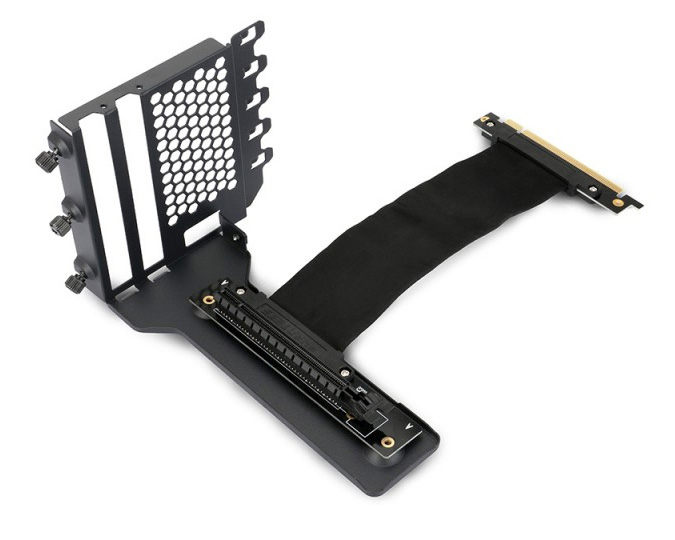
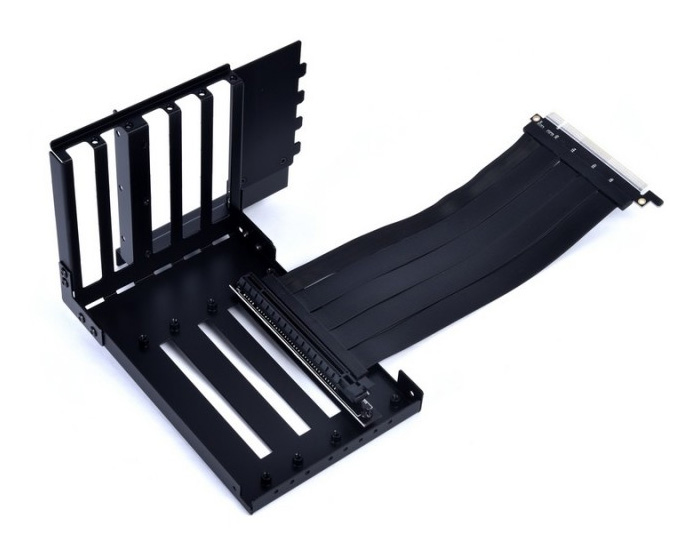
Extenders (risers) come in different types and cost from $50-60 USD.
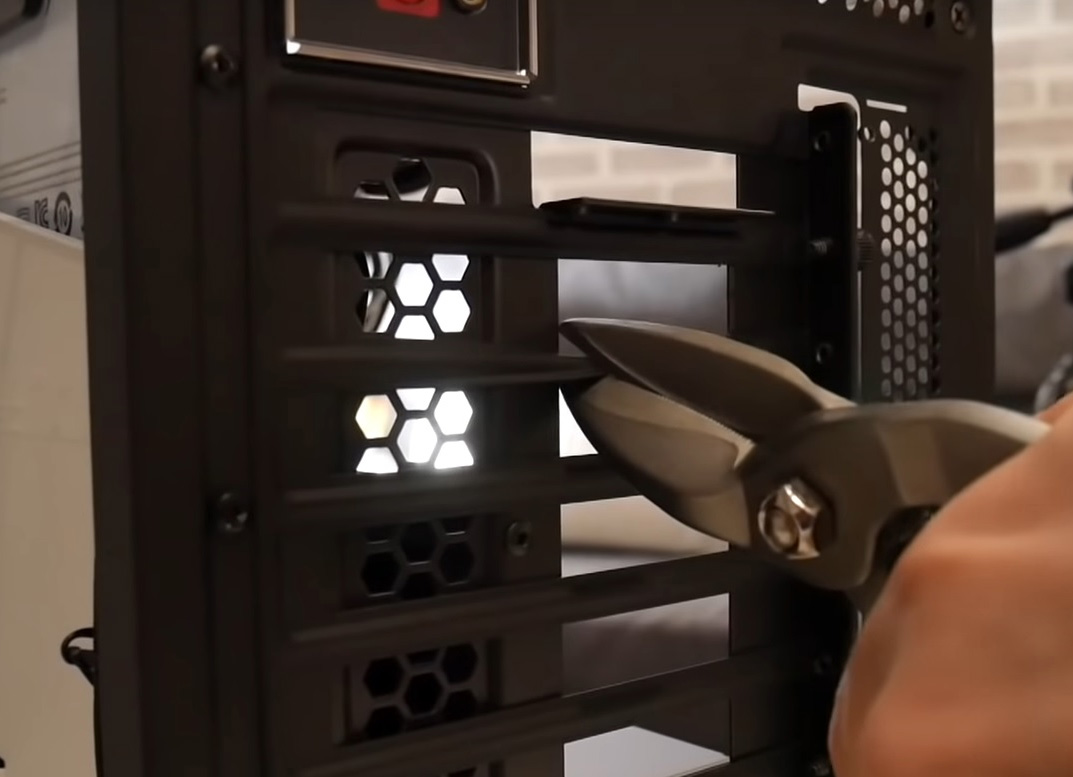
Installing a Graphics Card Vertically in Any Case
If none of the warnings have deterred you and you want to install the card vertically on your own, there is a way to install it in any case. All you need to do is cut a hole in the back for it, depending on your skills in detailed cutting.
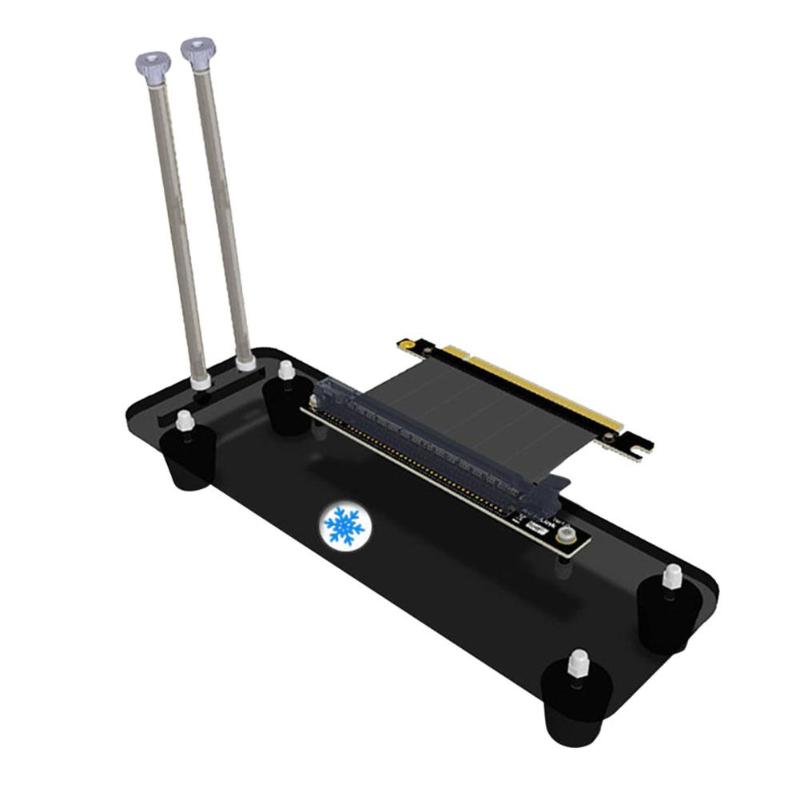
For such a setup, a special stand with supporting bolts is needed.
Since the case is not designed for this, you will need to drill all the holes for the screws. In principle, this task is not difficult, if you have the desire.
Replacing a Graphics Card in a Laptop
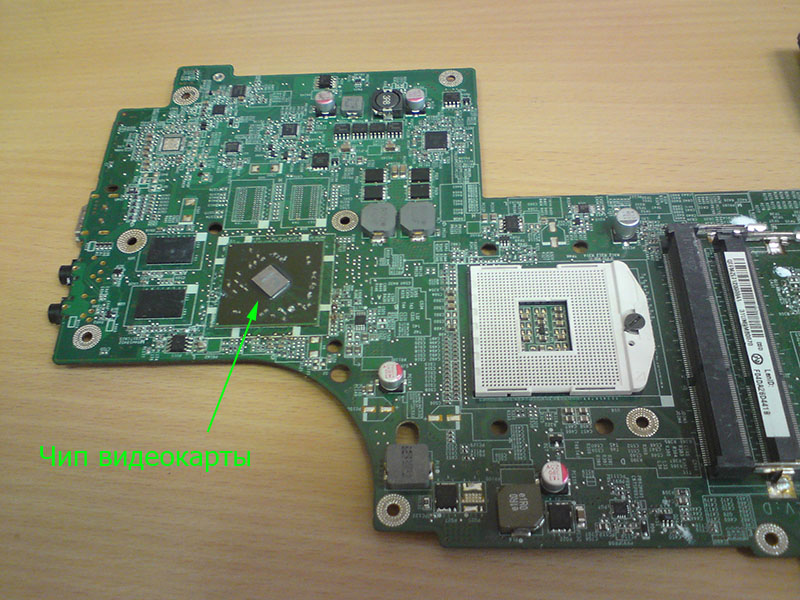
If the card is soldered in, as shown in the picture, and is one with the motherboard, replacing it at home is impossible. You need an infrared heater, a template, flux in balls, etc.
If you want to replace the graphics card with a more powerful one, it's not that simple either. A soldered chip is unlikely to be replaced with a better one, as you simply cannot "teach" the system to work with it since it's just a chip, and it uses its memory located separately on the motherboard, etc. You cannot desolder all the components of the graphics card and replace them with new ones so that everything works.
If the graphics card is removable, miracles can happen if you find a similar board with a more powerful chip. But the likelihood of this is very small.
Also, if your laptop currently uses an integrated graphics card, you cannot install a new one inside the case, but you can install it externally. More on that in the next section.
How to Install a Second Graphics Card in a Laptop
Usually, laptops do not have space for a second graphics card inside the case. If a manufacturer has provided such an option, it is typically a single model with a simple solution, usually provided by the same manufacturer for installing a second graphics card.
Installing it inside is not possible, but connecting it externally is. There are several options for this.
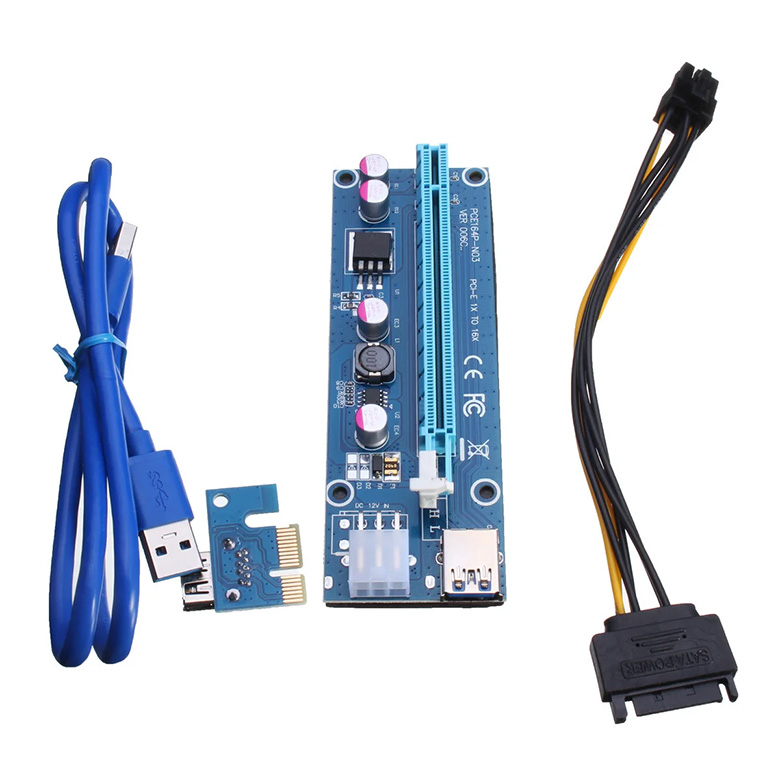
USB 3.0 Adapter
Simple as a bicycle. You plug it into a USB 3.0, connect the card to it, and then the card to a power supply. Yes, the power from the USB 3.0 port will be insufficient, so you will need a full-fledged computer power supply that will sit on the table next to the laptop. Once connected, you will see a new device in the system, and after installing the drivers, you can use the power of the selected card. The downside is that the USB 3.0 port is very slow and cannot provide the necessary data transfer channel for comfortable gaming on a more or less powerful graphics card.
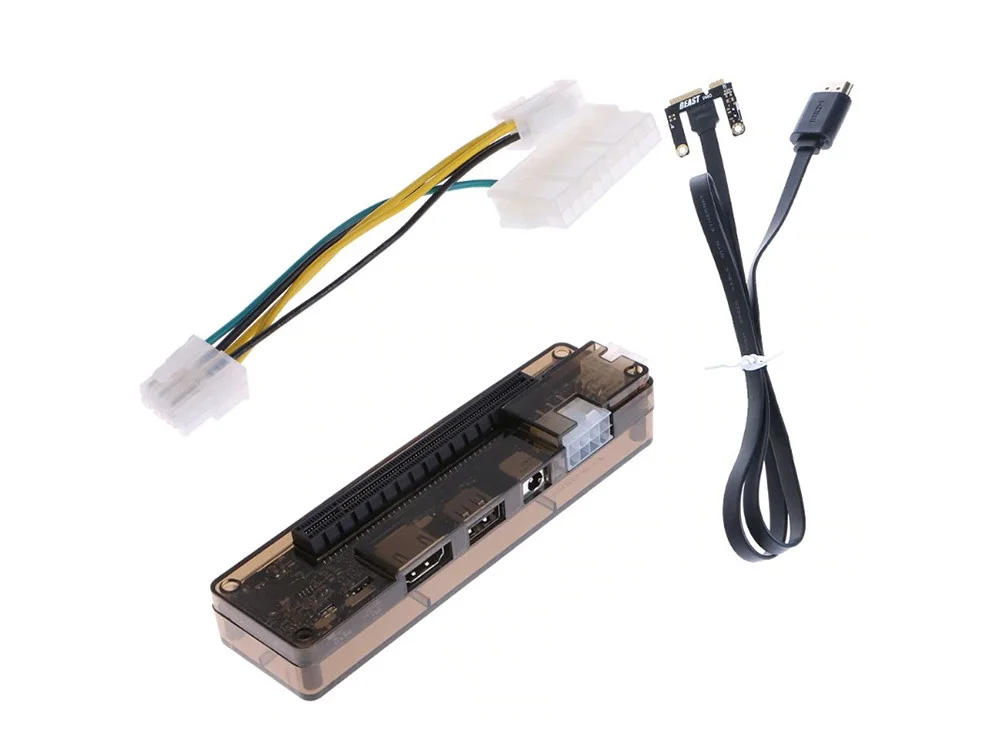
mini-PCIe
Every laptop has a WiFi/Bluetooth module connected via a mini-PCIe slot. To connect a graphics card this way, you need to disconnect this module. You will also need additional power from an external power supply. The principle is the same as described above, but you will need to somehow connect and bring the wire out from the depths of the case.
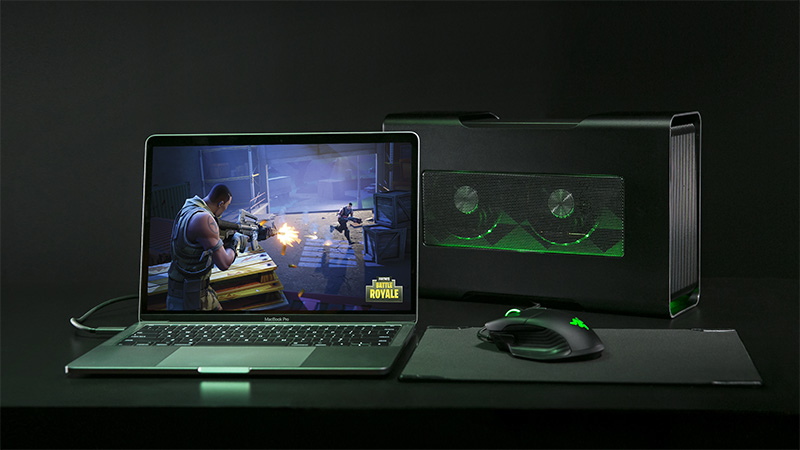
Thunderbolt
If your laptop has such a port, you can easily connect any desktop graphics card to your laptop without restrictions and even without disassembly.

There are special cases for connecting external graphics cards. In the photo – Razer Core (connects via Thunderbolt). It has its own built-in power supply that allows connecting graphics cards with power consumption up to 375 watts. For comparison, the new RTX 3090 has a power consumption of 350 watts.
Installation is very simple, and most laptops instantly react to the connection of a new device, you just need to install the drivers and select the desired video adapter in the game settings.
Performance with such an adapter slightly decreases, but if we are talking about FullHD resolution, then RTX 30 cards should be enough for any game at maximum graphics settings.
What to Do After Installing a Graphics Card
After turning on the computer with the new graphics card, you can use it normally, but games will not work until you install the drivers.
How to Properly Install Drivers for the Graphics Card
You can download the drivers from the official website or use an auto-loader – these are third-party programs that search for new driver versions for all devices in the system. Sometimes they install a lot of unnecessary stuff, so if everything is working and you only need the "drivers" for the graphics card, it is better to use the official websites:
Some manufacturers provide software for controlling lighting or fans with their graphics cards, which can include many useful features, so do not limit yourself to just the official drivers, download additional programs from your manufacturer. These will not be drivers, but they will expand the functionality of the card.
If you followed the advice and reinstalled Windows before all these manipulations, you will need a minimal package of various things for the games to work properly. All links to official servers:
There could also be Vulkan, OpenAL, OpenGL, NVIDIA PhysX, and other libraries here. But they are used less frequently, and most often, if a game lacks them, it will prompt you to download the necessary component from an official site.
If you did everything correctly, the new graphics card will work at full power.