Processor is one of the main components of a computer, which, along with the graphics card, determines its power and affects what games you can run and with what settings. Choosing a processor is most difficult if you already have a computer and easiest if you are building a new one. It's all about the socket. Almost every series of processors, even from the same manufacturer, has a different socket than the previous one.
Intel recently switched from socket 1151v2 to socket 1200 for mainstream processor models. High-end CPUs are based on socket version 2066. It is also worth mentioning that both companies have separate sockets for servers and high-end models. For example, AMD's Threadripper series is installed on motherboards with socket sTRX4. Mainstream models recently switched from AM4 to sTR4, but there are still many processors that work on the old sockets.
How to choose a socket
You can now buy a decent processor on an old socket and pay significantly less than for a processor with the latest socket. However, you may find yourself in a situation where instead of replacing the processor in about 5 years, you will be forced to buy a new motherboard, and possibly new RAM if DDR5 becomes the official standard by then.
For example, let's compare the Intel Core i7-9700KF with its later generation counterpart i7-10700KF. The main difference between them is that the 10th generation processor has 16 threads instead of 8, and it consumes more power. The price difference between them is almost $100, which is 30% of the price. The additional threads will not help you in games, and the difference in synthetic tests is around 2-3% in performance.
At first glance, the choice seems obvious: you should opt for the cheaper model. But this is the main mistake. The socket remains relevant for about three years, as practice shows. During this time, three generations are released, i.e., one generation per year if we are talking about Intel. As for AMD, it's unclear as they made a long pause in developing Ryzen and are now working at their own pace, so it's unknown when we will see a new socket.
If you are building a new computer, it's best to choose a processor with the latest socket. This way, after some time, you can replace it with a more powerful model without replacing the rest of the hardware. Choosing an older socket may result in a situation where you can only keep the graphics card and power supply when upgrading the system.
If you decide to go for a processor on an old socket, you need to choose the model with the highest performance. An old socket is not one that is outdated but one on which no new processors are expected to be released. Building a "ceiling" system on an old socket eliminates the possibility of inexpensive upgrades but gives you a solid power reserve that will last for many years.
Overclocking
Whatever model you buy now, it's best to choose one with the "K" designation - these processors have an unlocked multiplier. This means you can safely increase the frequencies, thereby boosting the performance of the hardware. At the same time, the heat will increase, so you will need to take care of the cooling system. This is important because if your computer overheats, it will shut down, and in the worst-case scenario, it might burn out.
If you buy a processor with low heat dissipation, you can save on cooling, and if you need to increase performance, you can replace the radiator with a more powerful one and slightly raise the frequencies.
What to consider when overclocking:
- Quality of the power circuit. Usually, entry-level motherboards are equipped with low-quality transistors to reduce the product's price. For the processor to work in normal mode, this is quite enough, and such a board will "live" much longer than the processor remains relevant. But if you need overclocking, pay attention to boards from gaming lines, as they are designed for serious power loads.
- Cooling of motherboard components. All power to the processor is supplied through the motherboard. No matter how high-quality the transistors and chipset are, they need cooling. If it's provided initially - great, if not, you will have to add it yourself. Check out the article on installing cooling. Even if it's not provided, in 10-15 minutes, you can glue small radiators with thermal conductive glue, and with proper airflow, everything will stop heating up.
- Power supply capacity. In overclocking, some processors can consume up to 1000 watts of power at a voltage of 1.0-1.5V. You need to ensure the power supply can handle this level without burning out. Remember that in the system, besides the processor, there are other consumers. While you can ignore the power consumption of RAM and storage, a high-end graphics card can draw up to 400 watts.
- Number and quality of phases. From school physics, we know that transmitting low-voltage power without loss is very difficult, and with such a current strength, the conductor must be of gigantic size. In motherboards, this is arranged with converters from 12V to the required value. Since you don't see wires as thick as a finger on the motherboard, the power is supplied by several phases. The more of them on the motherboard and the higher their quality - the better. Remember that the power supply is chosen specifically for the motherboard connector and the power of all consumers.
How to choose a replacement processor
If you are tied to an existing system, you need to know the motherboard model and your processor model. The model, not the technical specifications. Usually, motherboard manufacturers list on their official website which processor models are compatible with a particular motherboard. You are limited only to processors on one socket.
Keep in mind that socket compatibility does not guarantee full compatibility of all processor models on it. For example, Intel recently had socket 1151, with 2 versions and 3 chipset versions for it. Each specific chipset works only with the models it was flashed for. Theoretically, you can make any processor work with some BIOS and chipset re-flashing. But no one will give you a precise instruction on what to do and how, so if you don't know how the system works and can't do it yourself - discard this option as impossible.
Therefore, processor selection should always be based on the motherboard's technical recommendations. The main principle when upgrading is to take the best from what fits your configuration. It's economically unfeasible to change the processor again on the same platform; it's better to buy a new motherboard, power supply, and processor right away.
Processor replacement
For this operation, you will need:
- A small Phillips screwdriver. Needed to open the case cover and remove the graphics card if it's screwed to the bracket.
- Some alcohol and a cotton pad or swab. This is necessary to clean the processor and radiator from old thermal paste.
- A wooden stick. In case the thermal paste is strongly "stuck".
- A plastic card or a regular cellophane bag. This is needed to apply thermal paste. It's convenient to spread with a card as it is flexible, or you can wrap your finger in a bag and spread it. Choose whichever is more comfortable, there are many methods, but it's not a complex task to describe all of them.
- Thermal paste. Note that you need thermal paste, not a thermal pad. Liquid metal will also work, but only if you know what you're doing and why.
- Tweezers. Useful if you have a large radiator and graphics card. To disconnect the fans, it's easiest to use tweezers.
- Good lighting. Set up a lamp near the place where you plan to disassemble the computer. If this is not possible, keep a flashlight or at least a phone with this function handy.
Computer disassembly
To replace the processor, you will have to remove almost everything installed in the PC case. Do everything carefully and, most importantly, do not use force, as many connectors have latches, which we will tell you about and warn you about. When performing any manipulations with the computer, unplug the power cord. It would also be good to clean it; you have two options: either take it outside and blow it out with compressed air or clean each part with a brush as you disassemble it. Another option is to vacuum it, but in this case, you need a really powerful vacuum cleaner with a thin nozzle.
Step-by-step instruction
-
Disconnect all devices
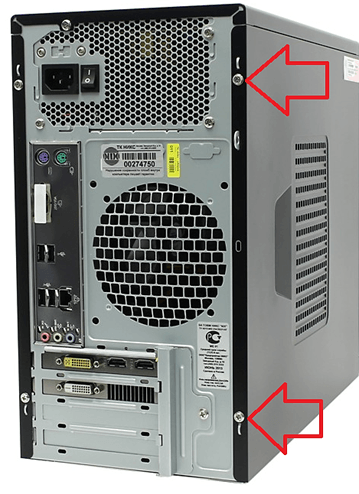
Disconnect all cords sticking out from the back of the case. If your monitor is connected via DVI or VGA, they are screwed to the graphics card. Do not try to pull them out; first, you need to unscrew the bolts.
There is a latch on the router cable, bend it before pulling out the plug.
-
Remove the case cover
If you have a standard case, the cover is secured with two bolts. Unscrew them and set them aside to avoid losing them in a matchbox or the bottom of the case after you remove the cover. The bottom has rims on all sides, and they will not fly away. Note that there may also be bolts at the corners of the case, which do not need to be unscrewed. Usually, cheap cases use rivets there, but there may also be bolts.
Move the case cover to the side and simply remove it.
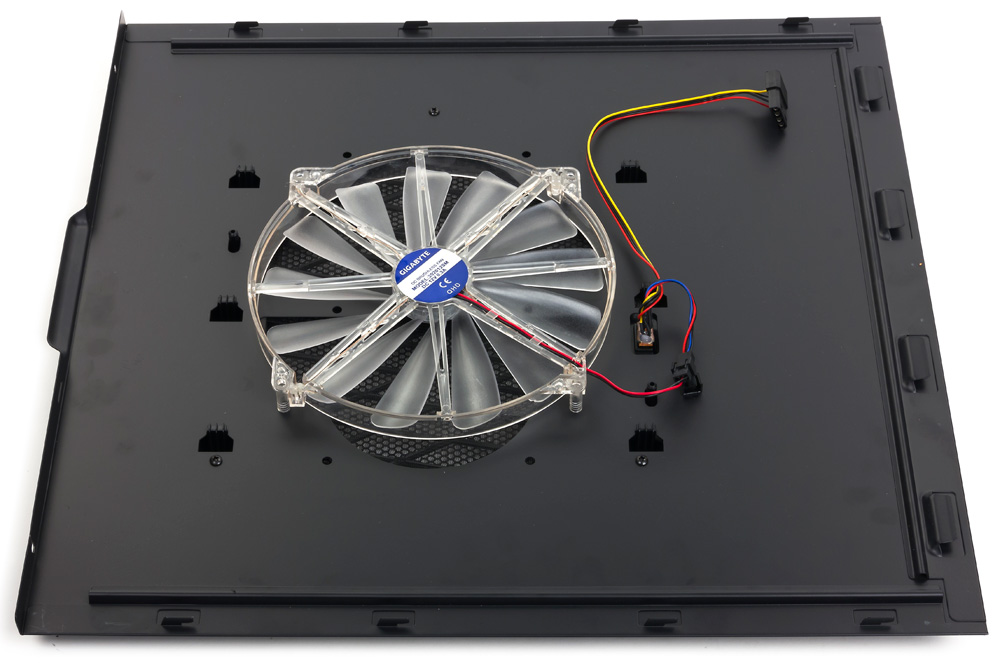
Some cases have fans on the side cover. They connect to the motherboard or power supply. Do not pull the cover too hard as you may tear the wires or damage the connector on the motherboard.
If you have a fancy case with a transparent cover, it is held by four bolts, which need to be unscrewed. To avoid damaging the tempered glass, remove the cover with the case lying on its side so that the glass is lying flat and does not fall after you remove the fastening.
-
Remove the graphics card
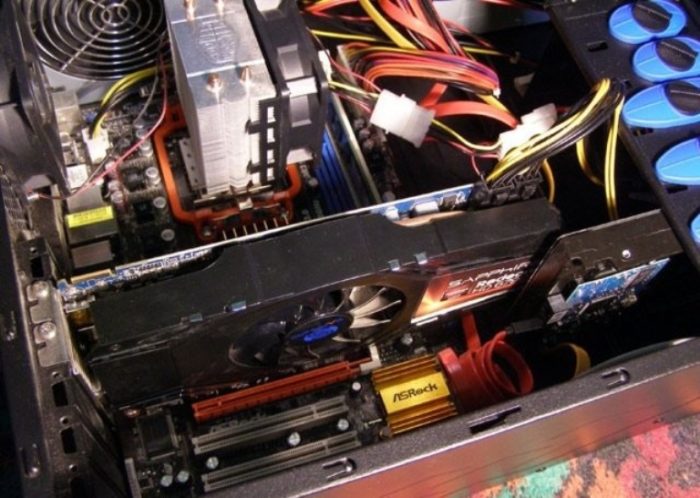
Disconnect the additional power cords if there are any. They come from the power supply and attach to the card with a latch. Usually, this latch is located at the bottom; you need to press the lever and, holding the graphics card, pull out the plug. This connection is quite tight, so you need to hold the graphics card firmly by the PCB - if you press the heatsink too hard against the board, you can crush the crystal. So, hold only the board itself.
Next, you need to unscrew the fastening. There may be a quick-release connection or a folding bar instead of bolts. In short, you need to free the graphics card to pull it out.
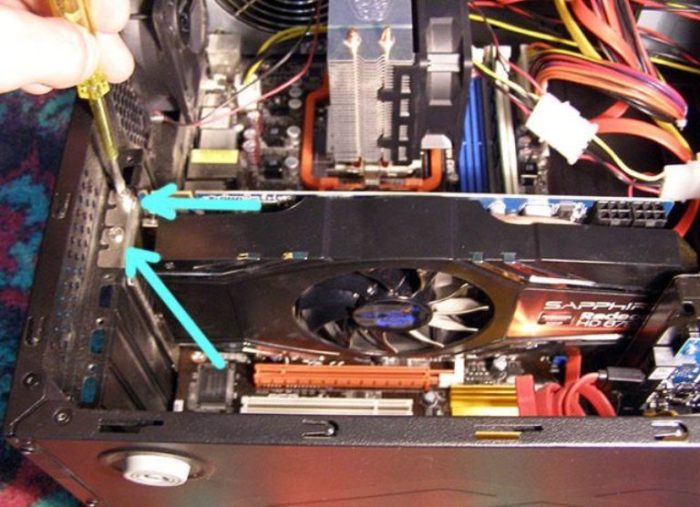
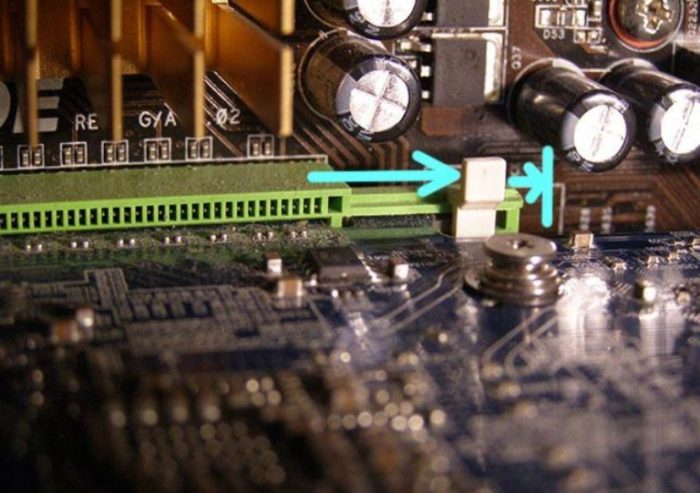
The next step is to bend the latch on the slot. In some cases, there may be no lever, and the graphics card will be clamped by plastic tabs. Then they need to be spread apart, and you can remove your card.
-
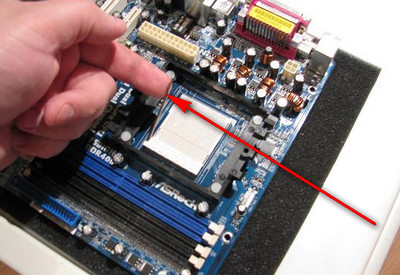
Remove the processor heatsink
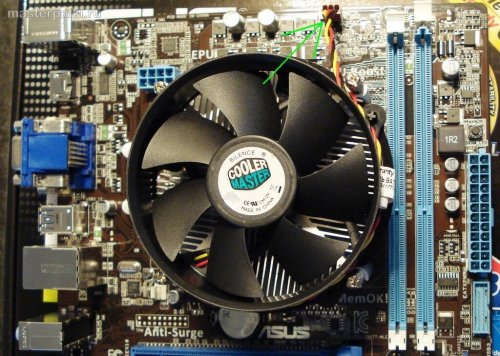
Disconnect the fan power from the motherboard (in the photo). If you have a small heatsink, this will be easy, but there are real monsters, so-called tower heatsinks. They are bulky, and to reach the cooler connectors behind them, you will need to use tweezers.
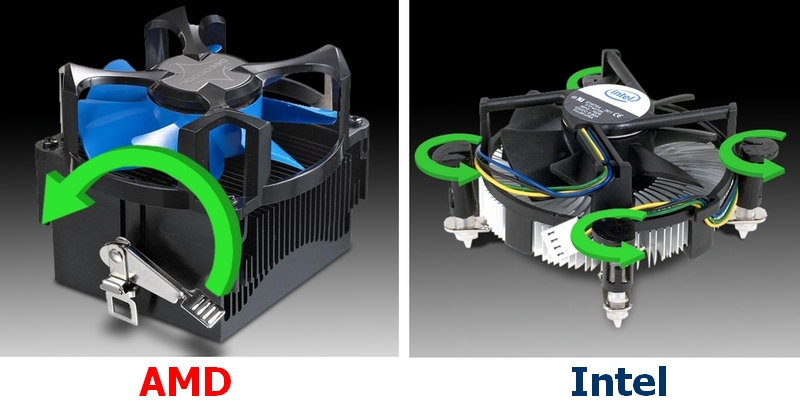
All heatsinks are attached in two ways. If you have AMD, you need to bend the lever with the eccentric clamp. Intel guys prefer to mount their coolers on four plastic rotary clamps. Note that no screwdriver is needed; everything rotates by hand. It is worth noting that AMD stock coolers for Ryzen are now also mounted on 4 plastic clamps like Intel.
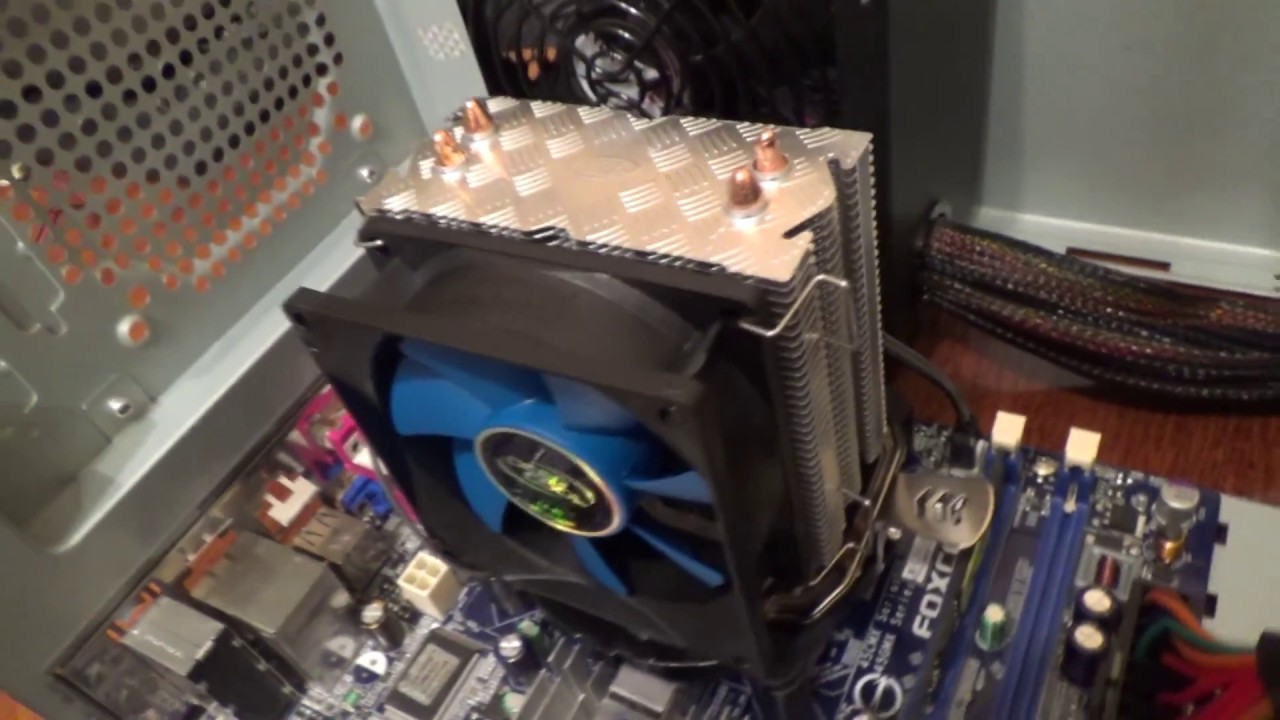
If you once spent money on a powerful heatsink with thick copper pipes, they are usually mounted on screws. This refers to the most massive and efficient models. Note that usually, such heatsinks have a reinforced mount on the other side of the motherboard.
If you unscrew such a heatsink when the computer is in a vertical position, the plate may simply fall down, and you will have to completely remove the motherboard to reach it and put it back in place. In most cases, it is additionally secured so that you don't have to remove the board entirely every time. Be careful.

There are also tower heatsinks that are removed through an alternative clamp. A metal strap is on the part that locks the mount. You need to grab it with both hands and press, then remove the loop from the hook. This is not difficult, but such a mount will require you to apply a little force. This type is usually found on heatsinks from DeepCool.
-
Clean the thermal paste
It is best to clean the old processor now, making it easier to store. Also, clean the heatsink at the same time. Remember, any scratch is bad. Use plastic, wood, any fabric. Avoid metal tools, screwdrivers, sandpaper, or especially files.
If you think the surface of the heatsink is very scratched and scuffed, leave it as it is. It is almost impossible to manually polish it to a smooth surface. There is a risk of disturbing the flatness, which will directly affect the quality of the contact between the two surfaces. Such operations can only be performed on a flat grinding machine, preferably with a grinder of no less than the 6th grade.
-
Remove the processor
After everything is cleaned, you need to remove the processor; for this, bend the clamp lever, and it will pop out of its socket. Be careful, many processor models have numerous pins on the bottom side, which should not be bent, let alone broken.
-
Install the new processor
Choose the instruction for your processor.
AMDNote that Ryzen processors have a marked corner. In older models, a piece of the textolite is simply cut off.
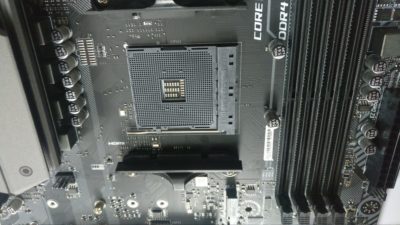
In the photo, you can see that the upper left corner of the AM4 socket is marked, there is no contact there, and instead of a smooth step, there is a sharp inner corner. The same corner is on the processor; you need to align them. Although this is a "foolproof" measure, you still cannot install the processor incorrectly unless you break off an extra pin.
Once you install the new processor in place, clamp it with the lever and start applying the new thermal paste.
AMD Ryzen Threadripper Socket TR4/TRX4If you decided to get such a monster, there is a video instruction from MSI for you. As you can see, you need a special shaped screwdriver to remove it. The processor is installed in a plastic case, and instead of the usual lever, screws are used.
Since the lid surface of this device is slightly larger than that of other processors, more thermal paste will be needed. Note how the heatsink is installed - it is screwed with bolts with springs.
 Intel
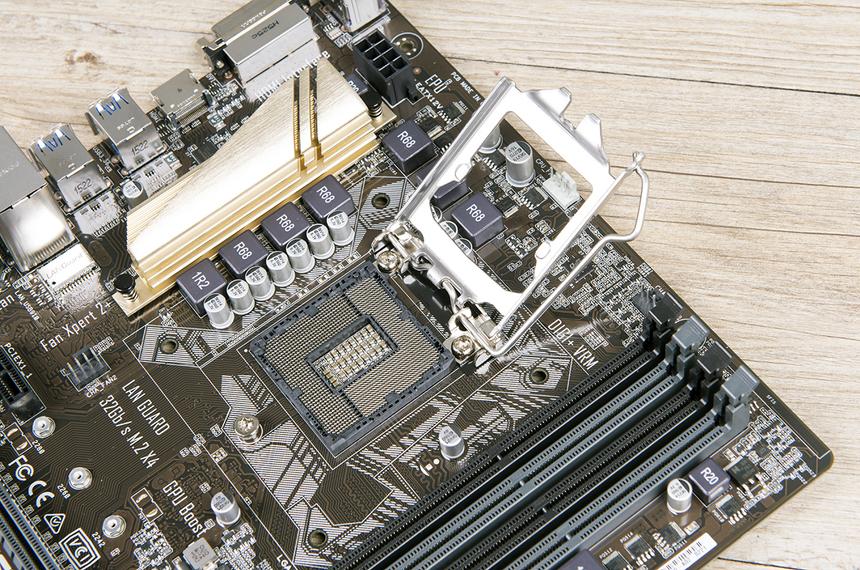
IntelThese guys use a slightly different method of processor mounting, here, in addition to the clamp lever, there is also a metal frame that is pressed with one screw. Once you bend it, the frame will come out from under the screw, and you can open it, thus reaching the processor.
It is not fixed in any other way; just remove it and pack it for storage. Place the new one in its place and press it with the frame.
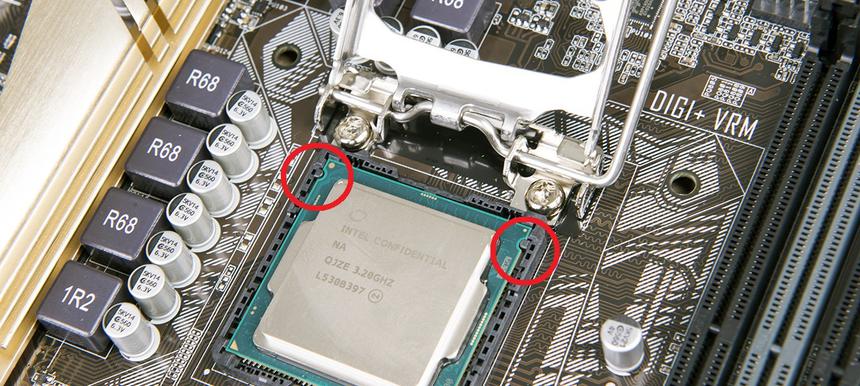
Note that there is also a foolproof measure here. There are two tabs on the sides of the processor case that are shifted upward so that you cannot install the processor upside down even if you try.
-
Applying new thermal paste
If you bought a brand-new processor, it's time to remove the protective film from it (from the new heatsink too). This is mandatory.
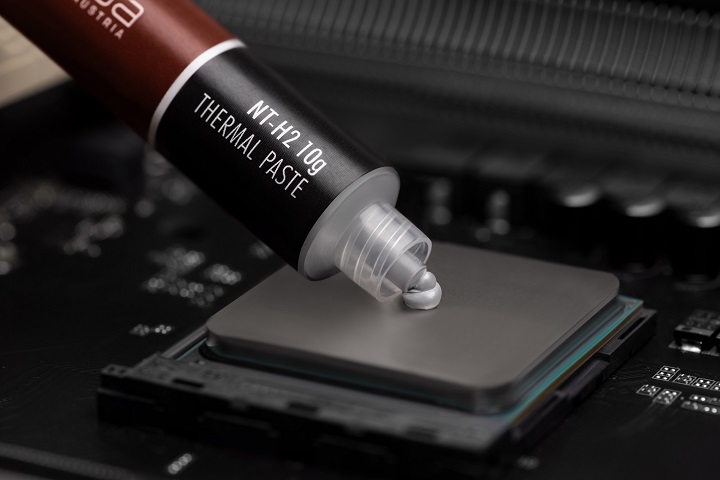
A few words about choosing thermal paste. Don't be stingy, buy good thermal paste from a reputable brand. If you don't know which model to choose, you can check the comparison table here or choose the one preferred by HYPERPC specialists - Noctua NT-H2. It is widespread worldwide, inexpensive, and shows excellent results in both durability and thermal conductivity. One 4-gram tube will last for 6-8 installations; this paste is also suitable for graphics cards.
If you can't afford Noctua, choose the popular Arctic Cool MX-4, which is one and a half times cheaper but also good.
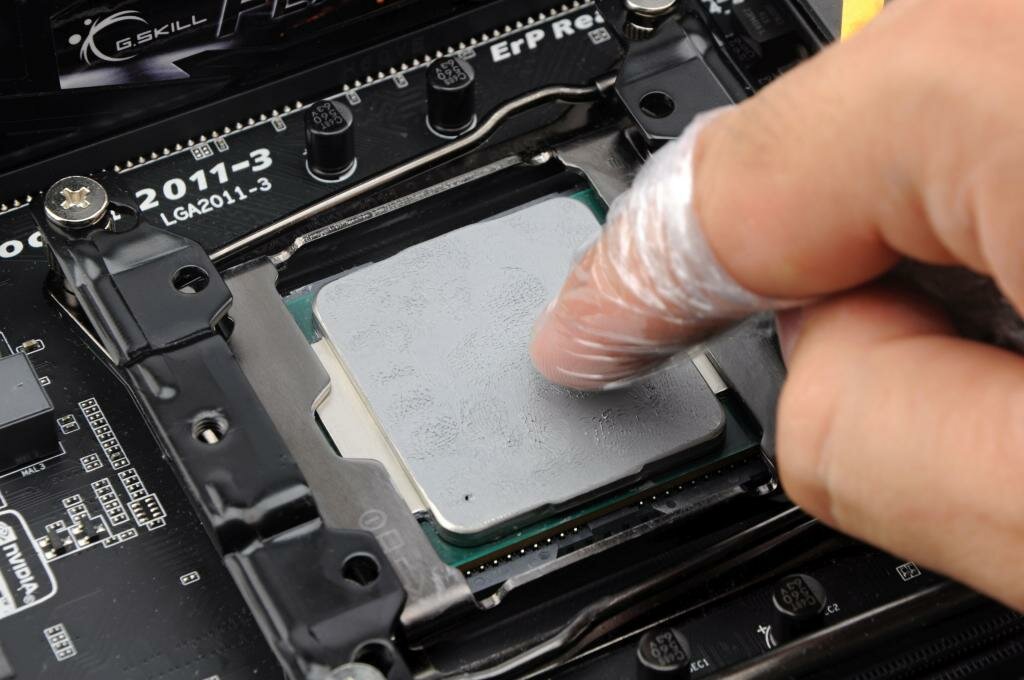
Squeeze out 1-2 drops the size of a match head on the processor and the heatsink. You need to cover only the contact area. There should be no drops or leaks on the processor's sidewalls or nearby. You can spread it with a spatula, plastic card, toothpick, or just your finger. Do not use a cotton swab, as it will absorb the thermal paste, increasing the consumption.
You should get something like in the photo. The thermal paste should only fill the microscopic irregularities on the processor lid and the heatsink surface. Its thermal conductivity is worse than that of metals in direct contact. But there will be air in microcracks and scratches, which conducts heat very poorly, so you need to fill all this with thermal paste. Apply a very thin layer on both sides to achieve the best contact.
Installing the heatsink back may cause some difficulties if you have a small motherboard. Then you need to remove the RAM. You can do this by bending the clamps at the top and bottom.
-
Assemble the computer
Assemble the computer in reverse order. Before screwing on the cover, check the machine for functionality; you may have forgotten to connect the cooler or a contact has come off from the storage device. In this case, you can fix everything quickly, but only after fully powering off the computer.
What to do after replacing the processor
In fact, you don't need to do anything. If you really don't want to reinstall Windows, just install the chipset drivers for this processor if the manufacturer offers them. Ideally, reinstall the system for more stability, but it's not necessary.
CPU replacement for laptop upgrade
With laptops, it's the same story as with desktop PCs. The only difficulty is that no one anticipates a laptop upgrade, so you will have to fight windmills like Don Quixote. Let's start by identifying your chipset – this determines which processors are supported.
Download the CPU-Z program (it's free) and find the Southbridge parameter on the "Motherboard" tab.

There's no point in describing all supported processors; let's shorten the list to a few top models for each chipset.
- Mobile Intel HM55\HM57 Chipset – 2 cores up to 35W: i7-620M and i7-620M; 4 cores up to 55W: i7-920XM and i7-940XM.
- Mobile Intel HM65\M67 Chipset – 2 cores up to 35W: i5-2520M and i5-2540M, i7-2620M and i7-2620M; 4 cores up to 55W: i7-2820QM and i7-2860QM.
- Mobile Intel HM70 Chipset - 2 cores up to 35W: Mobile Pentium 2020M and 2030M.
- Mobile Intel HM75\HM76 Chipset - 2 cores up to 35W: i7-3520M and i7-3540M; 4 cores up to 55W: i7-3820QM and i7-3840QM.
- Mobile Intel HM77 Chipset - 2 cores up to 35W: i7-3520M and i7-3540M; 4 cores up to 55W: i7-3920XM and i7-3940XM.
- Mobile Intel Socket G3, HM87\HM86 Chipset – 2 cores up to 37W: i7-4610M; 4 cores up to 57W: i7-4910MQ and i7-4940MX.
The table lists processors with two cores and four cores. At first glance, dual-core models are redundant, as there is no point in installing a deliberately weaker model. But it's all about heat dissipation. Most laptops provide cooling for up to 35 watts and up to 45 watts. In rare cases, it can be improved to 60 watts. You need to look for cooling options to fit your case, as all laptop models are very different.
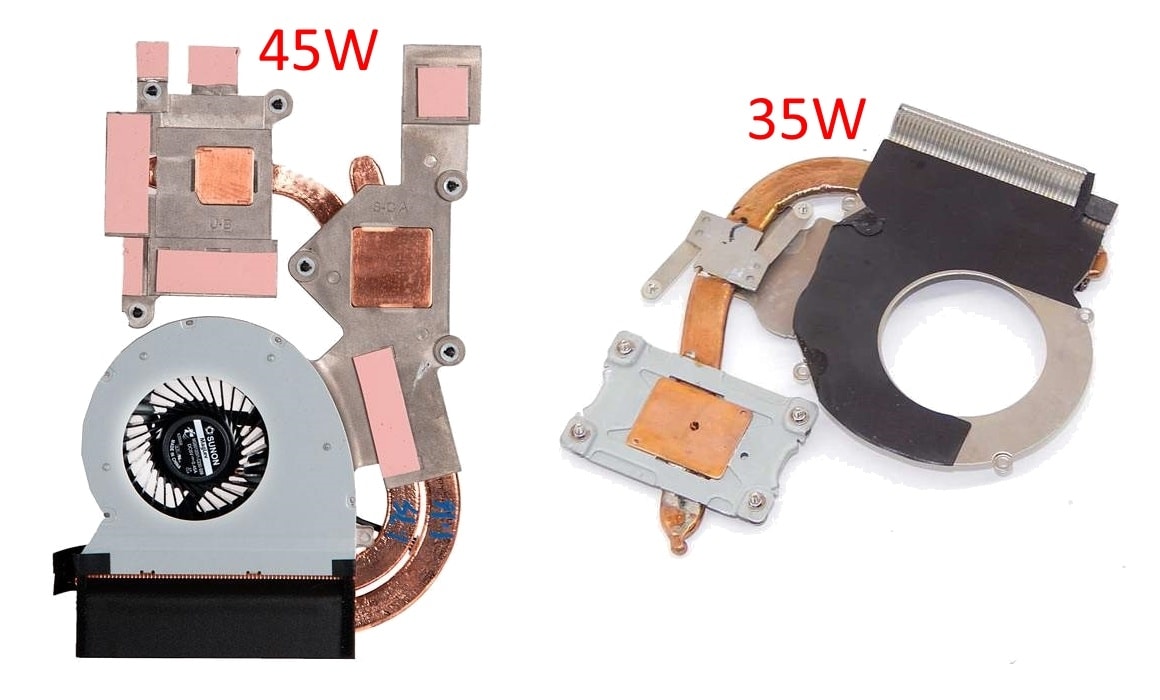
You can also install an external cooling system – a laptop stand with built-in fans. If you use the laptop on such a stand, you can safely install a model with higher heat dissipation. Away from such a stand, you can simply not load the processor so it doesn't overheat; at low frequencies, heat dissipation will be much lower.
There are no AMD chipsets in the table because there is no information on compatibility; each case needs to be considered individually. Often AMD processors are soldered to the board, making it impossible to replace the processor at home. Unless you have an infrared soldering iron, a template, and flux in balls.
Important: even if you install one of the processors from the list in your laptop, there's no guarantee that everything will work.
Technically, the process of replacing the CPU in a laptop comes down to the individual characteristics of disassembling the model. There are no general recommendations (videos on the internet made by experts might help). Even if your laptop has a quick access cover, it does not anticipate CPU replacement. So, you will have to disassemble it completely.
The processor in the laptop is not covered by an aluminum heat spreader, so it will be a bare crystal. All cooling system contacts need to be coated with thermal paste. When disassembling the laptop, you will need new thermal pads; using the old ones is not advisable.
We hope we helped you understand how to install and replace the processor. If you want to entrust the work to professionals, contact our UPGRADE CENTER.
List of processors
The main computing device of any computer is the central processor, and the performance of the entire PC depends on the CPU you choose. Therefore, we always offer our users the most modern and efficient processors for various needs.