To understand how a cooling system works, let's recall physics. The concept of "cold" does not exist; it is relative and cannot be changed. There is the concept of heat - any computer component that consumes energy generates heat. Everything around us has a certain heat charge that is constantly transferred from greater to lesser.
This is a very simplified explanation. But now we know that the air passing through the radiator does not cool it but simply takes the heat away. There is also thermal conductivity and heat capacity of materials. Radiators are made from materials with maximum thermal conductivity and minimum heat capacity. The point is that they can quickly absorb heat and quickly release it, not accumulating this energy within themselves.
The same principle applies to cooling the graphics card. However, due to the large number of manufacturers and the specific shape of this component, radiators are different and are made for a specific graphics card model, while CPU radiators are standardized.
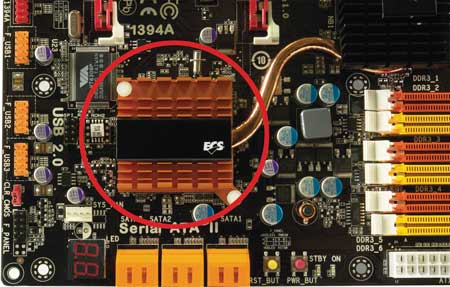
Some heavily loaded elements of the motherboard, such as the power chain or chipset, are equipped with radiators without fans. If your system involves overclocking, using a powerful graphics card and processor, you need good case airflow. Then the flow of fresh air will cool all elements with a passive cooling system.
Why is a radiator needed?
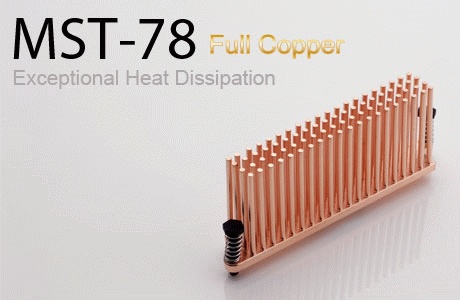
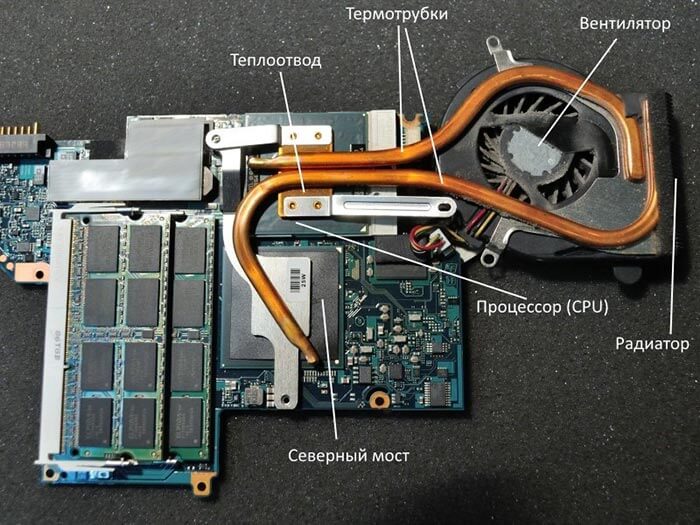
The processor case is made of aluminum (in the photo) - can't it release temperature into the air on its own, why is a radiator needed? Here you need to understand that there is such a concept as contact area. The processor itself is very small, and the air has insufficient thermal conductivity to remove all the heat that even the simplest processor produces.
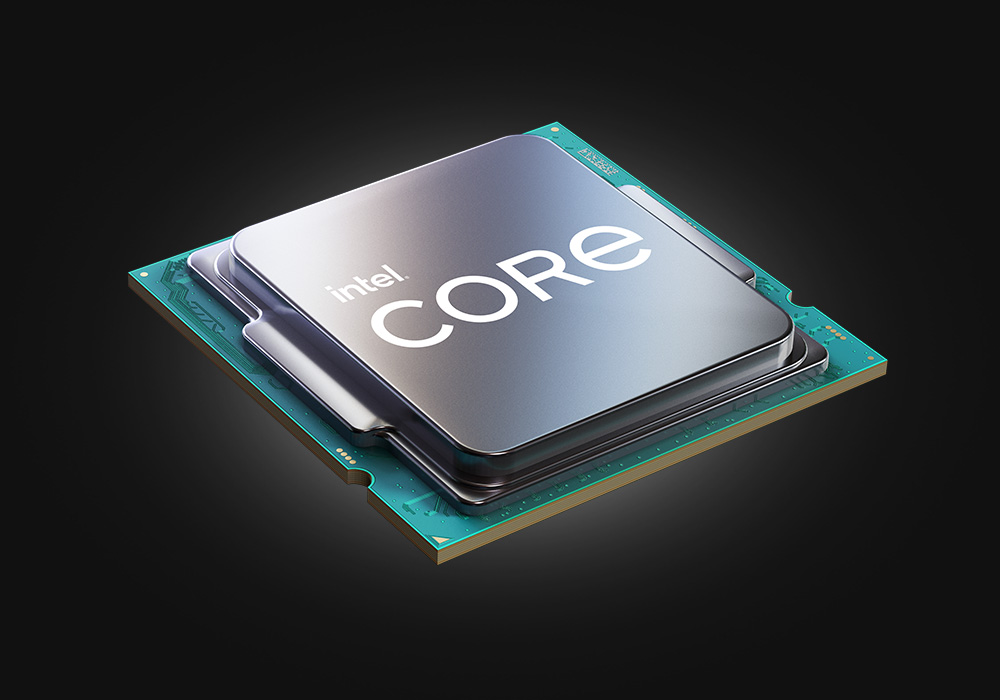
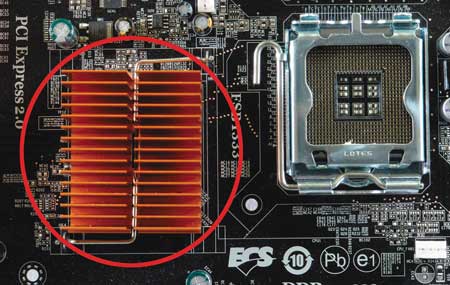
For this, a radiator is attached to the processor. It transfers heat through copper pipes to an aluminum grill, through which a large volume of air is driven by a fan. Thus, we dissipate heat much more efficiently.
In the photo, you can clearly see how the copper pipes transition into the aluminum grill.
The same principle applies to cooling the graphics card. However, due to the large number of manufacturers and the specific shape of this component, radiators are different and are made for a specific graphics card model, while CPU radiators are standardized.

Some heavily loaded elements of the motherboard, such as the power chain or chipset, are equipped with radiators without fans. If your system involves overclocking, using a powerful graphics card and processor, you need good case airflow. Then the flow of fresh air will cool all elements with a passive cooling system.
If the case airflow is insufficient, the processor and graphics card fans will just circulate already hot air. And as we know, the heat exchange process goes from greater to lesser, and the heated air no longer efficiently absorbs heat. As a result, thermal energy accumulates in the case, leading to overheating: in the best case, the automation will work and the computer will shut down, in the worst case, some component will burn out.
How to understand computer cooling systems
There are three types of cooling - air, water, and "aquarium" cooling
Fan and cooler are the same. In English, the word "cooler" also means "fan," and with the advent of computer technology, it firmly entered the lexicon of computer-related terminology.
Air cooling
The principles of air cooling were described above. It involves the presence of fans on large radiators and air blowing through the entire case. Thus, you need to ensure cold air intake at the front of the case and the ability to expel warm air at the back.
Water cooling
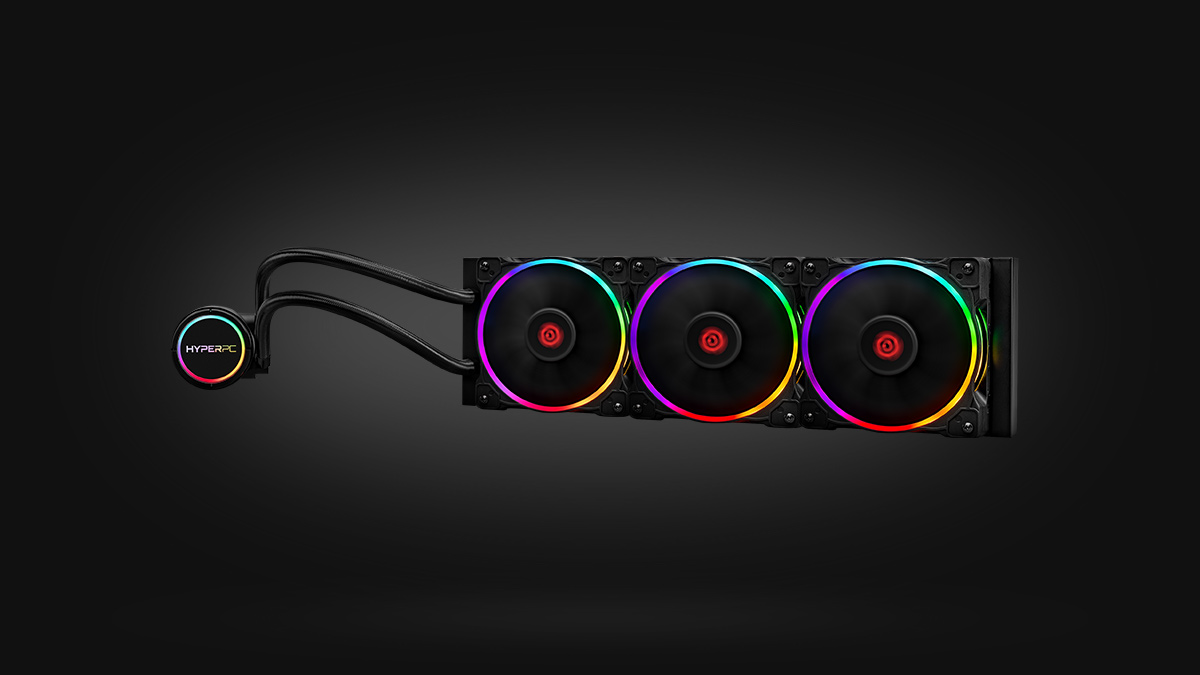
A more complex and much more expensive way to remove heat from a computer. However, it is also more efficient, and the system itself is significantly quieter and more aesthetically pleasing. Water cooling is installed in premium gaming computers.
You can purchase elements with lighting and synchronize them with the motherboard. For example, ASUS offers a simple installation kit of AIO for processors, Asus ROG Strix LC 360 RGB. The lighting is synchronized with ASUS ROG series motherboards and graphics cards. Management is carried out through common software.
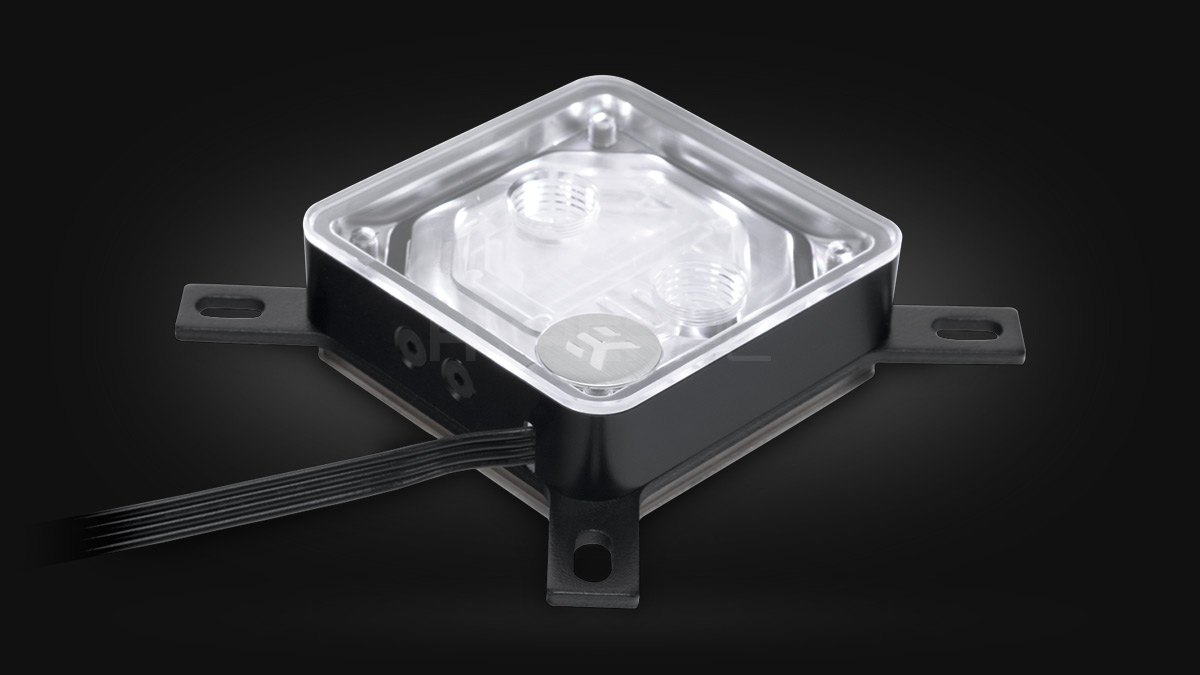
Remember the tower-type radiator with copper pipes shown above? Water cooling instead of copper pipes uses tubes with water or special liquid that has higher thermal conductivity and high heat capacity. Small copper or aluminum plates, called water blocks, are installed. They remove temperature from the chip or processor and transfer it to the liquid, which in turn gives it to the radiator. Water cooling system radiators are cooled by regular fans.
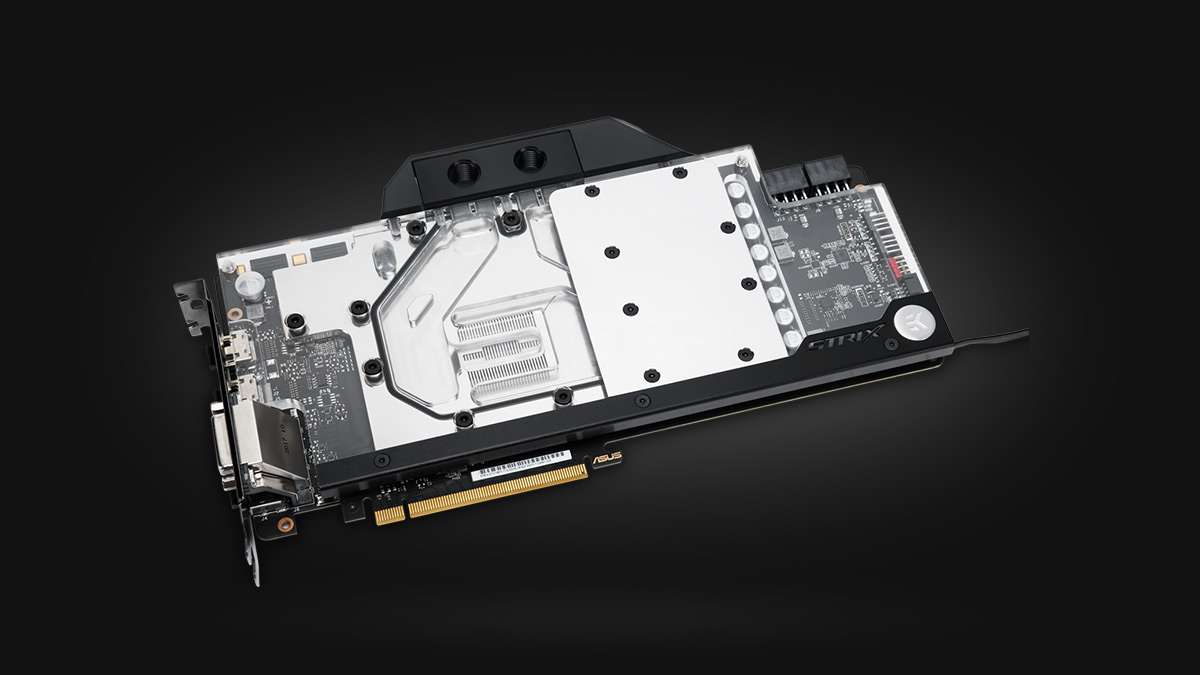
The difficulty of installing AIO (all-in-one liquid cooling system) is that each component (processor, graphics card) needs specific radiators with suitable mounts.
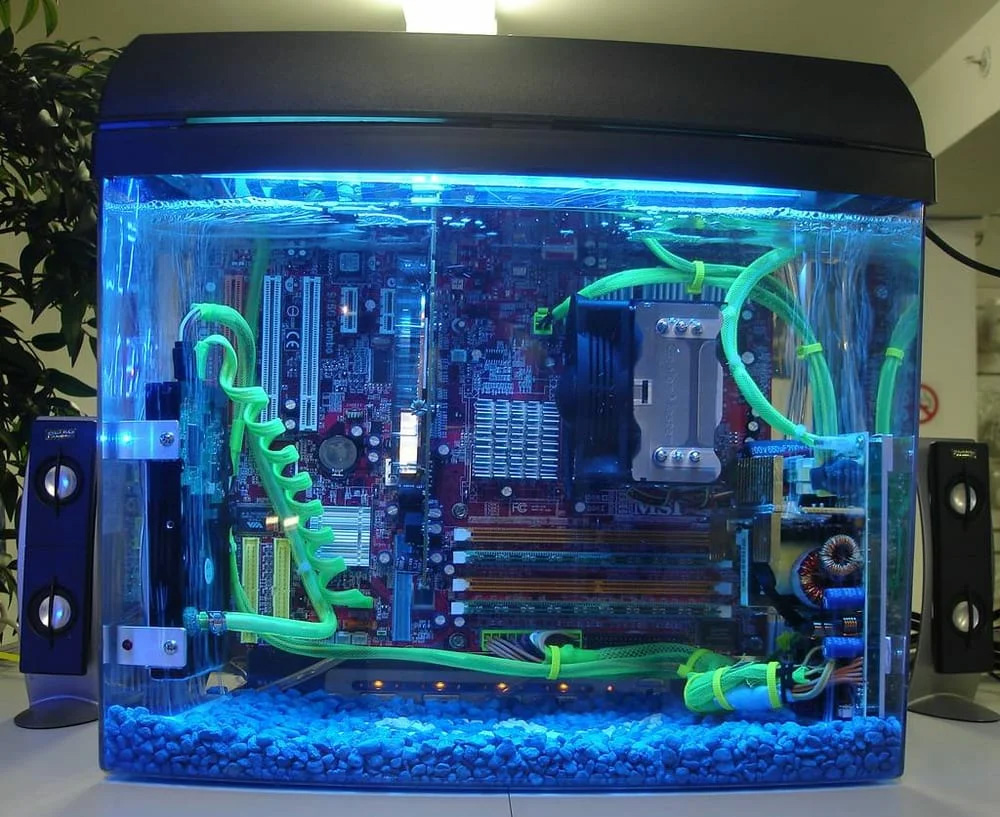
"Aquarium" cooling
There are no ready-made solutions on the market; it is a homemade setup that is of little interest in terms of effectiveness. Its biggest advantage is the complete absence of dust. Filling an aquarium with water is a bad idea; it will immediately short-circuit all contacts, and oxidation will begin. Instead of water, oil with low electrical conductivity or "dry water" is used.
Dry water is an invention of the American company 3M, which was developed for extinguishing fires. In fact, the composition of this substance is far from water; they have nothing in common except for a few similar physical properties, such as being a liquid, flowing, transmitting light, and so on.
The downside of "aquarium" cooling is that the area is little studied, and it is also difficult to find fans that will work underwater. Despite the high thermal conductivity of these liquids, you will still need to install a radiator and somehow circulate water through it. It is also desirable to have one wall of the aquarium made of aluminum to provide even more effective heat dissipation.
This option is suitable only for the most daring enthusiasts who are not afraid to experiment.
How to replace a fan
All moving parts in a computer or any other equipment fail. Somewhere a blade will break off, somewhere a bearing will buzz, in some cases the cooler replacement is purely cosmetic, for example, you want to add lighting or create a special design with unusual blades.
How to remove a fan from a computer
Before replacing, you need to get rid of the old cooler. A regular case fan is attached with four screws, in some cases these may be quick-release clips or special anti-vibration silicone screws. Unscrew the fasteners or detach the quick-releases.
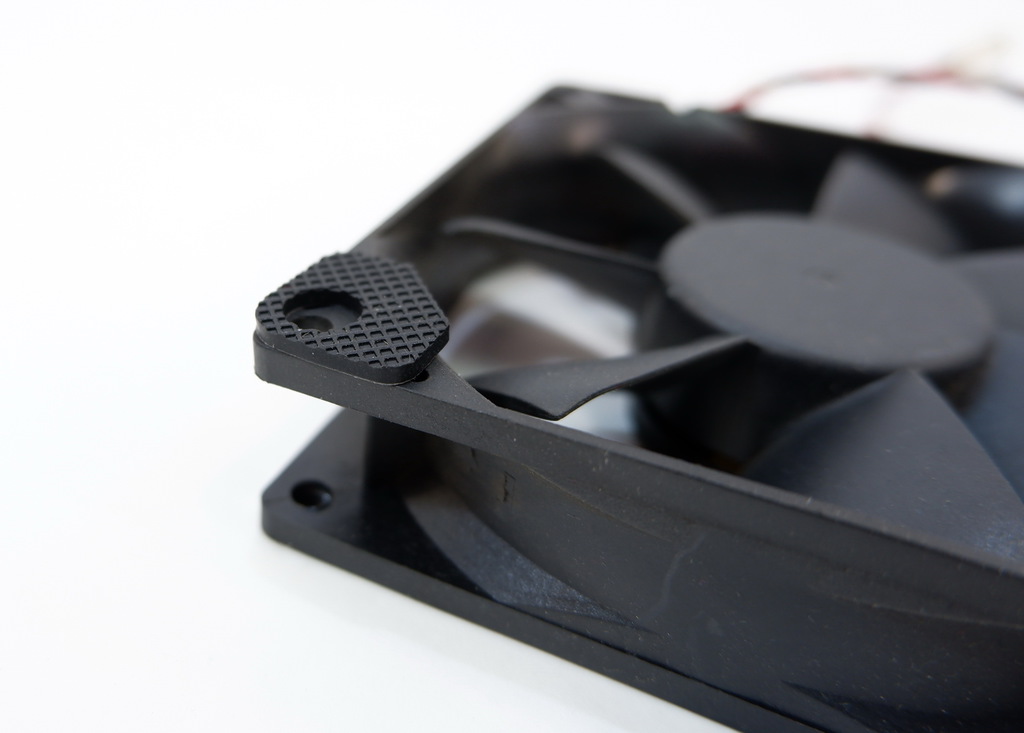
There should be an anti-vibration pad made of silicone or rubber, as well as a dust filter between the case and the fan. Carefully remove them - during long operation the pads can stick well to the case, if they are cracked or have already crumbled, they need to be replaced.
It is better to use an anti-vibration pad rather than silicone screws, it works much better and will extend the life of the cooler. If it is securely pressed against the case, its vibrations will not shake the axis. Silicone screws do not dampen vibration but simply prevent it from being transmitted to the case.
One of the implementations of the anti-vibration pad.
Disconnect the power connector from the motherboard is also very simple, just pull the wire a little, there is no latch. There may be several connection options - some coolers plug into the motherboard, some via the MOLEX connector directly to the power supply. Disconnecting the MOLEX is very easy, there are no latches either.
How to install a cooler on the case
When installing the fan, the main thing is to observe the air direction. Usually, the intake is at the front of the case and the exhaust is at the back. If you install it incorrectly, the cooling efficiency will decrease significantly.
To install the fan on the case, screw it in place with bolts in the corresponding holes or use silicone clips. There is nothing complicated here; all the holes are standardized, you just need to choose a fan of the appropriate diameter.
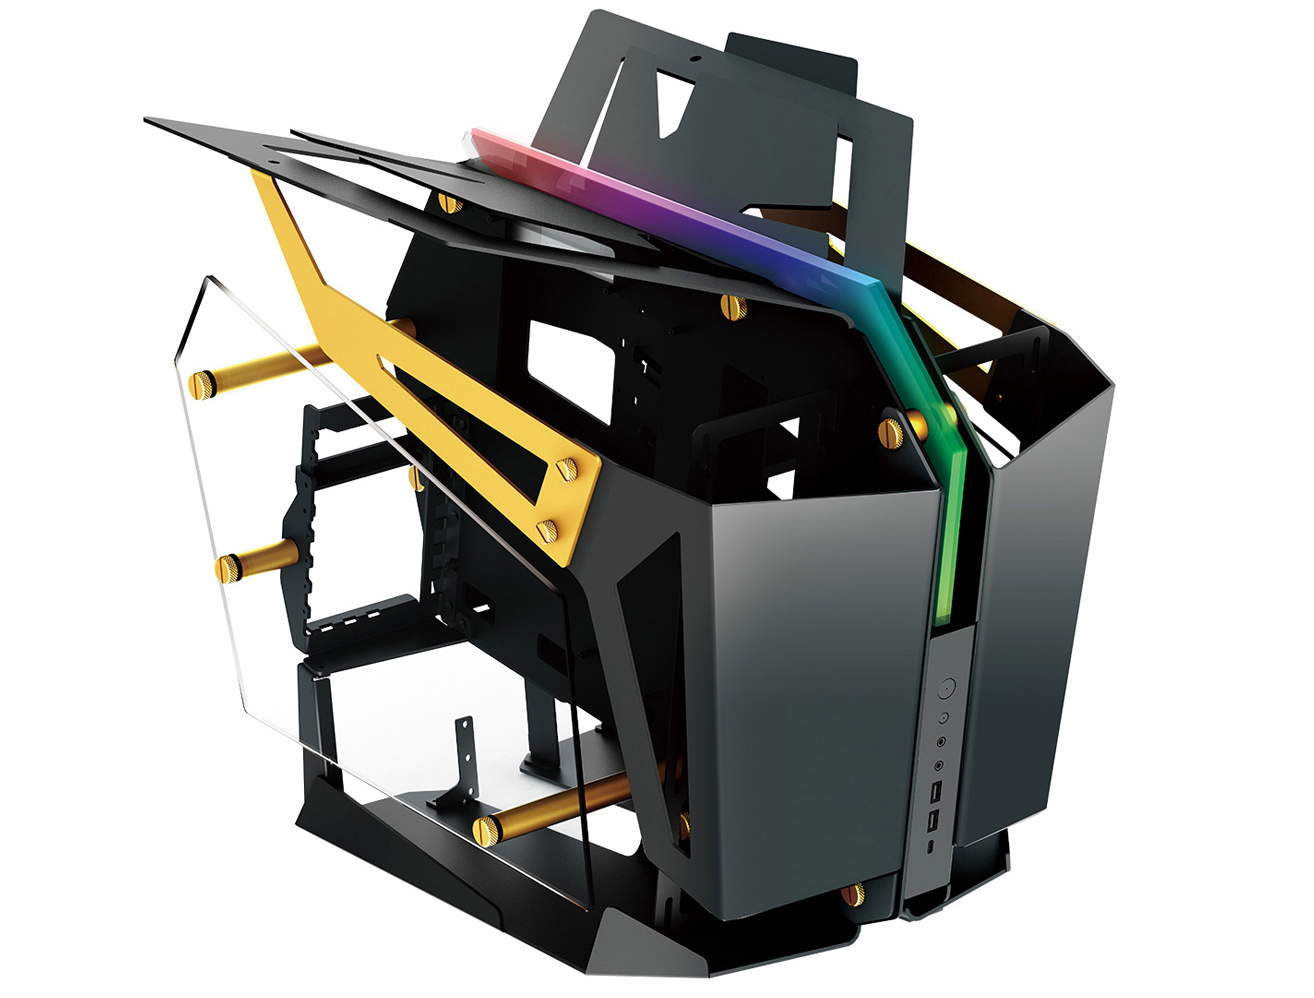
The standard case fans are considered to be 120 mm for the front side, and 80 mm or 90 mm for the back. Gaming cases are usually equipped with 120 mm fans on all sides. Special designer models may have an original airflow system.
Usually, such cases come with a set of installed cooling or at least an instruction manual.
How to connect a cooler to the motherboard
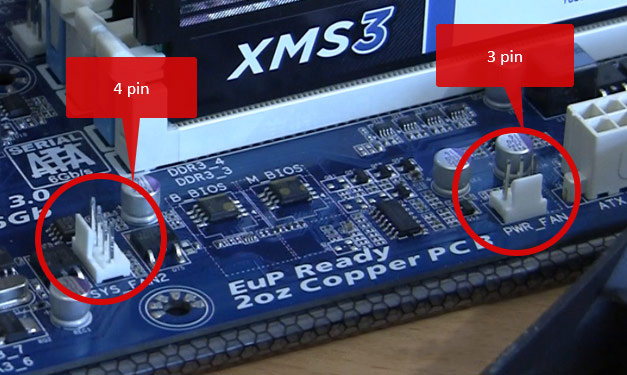
After you have screwed the cooler in place, it needs to be connected. The motherboard has different connectors, usually 3 PIN and 4 PIN. If you have a 3-pin fan, you can connect it to both a 3 PIN and a 4 PIN connector, but if you connect a 4 PIN cooler to a 3 PIN connector, you will not be able to use the control system through the utility.
How to regulate fan speed
For this, there are separate devices - a board hub or rheobus.
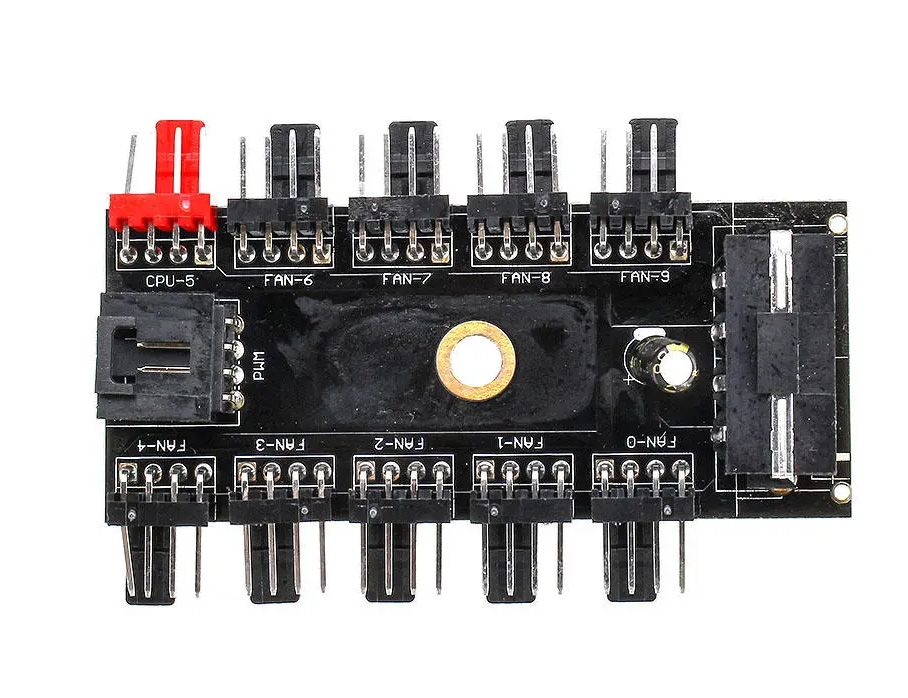
Board hub will allow you to connect many coolers to one output of the motherboard. The downside is that it does not have an external regulator; you also cannot give commands to each individual fan, but only to all together.
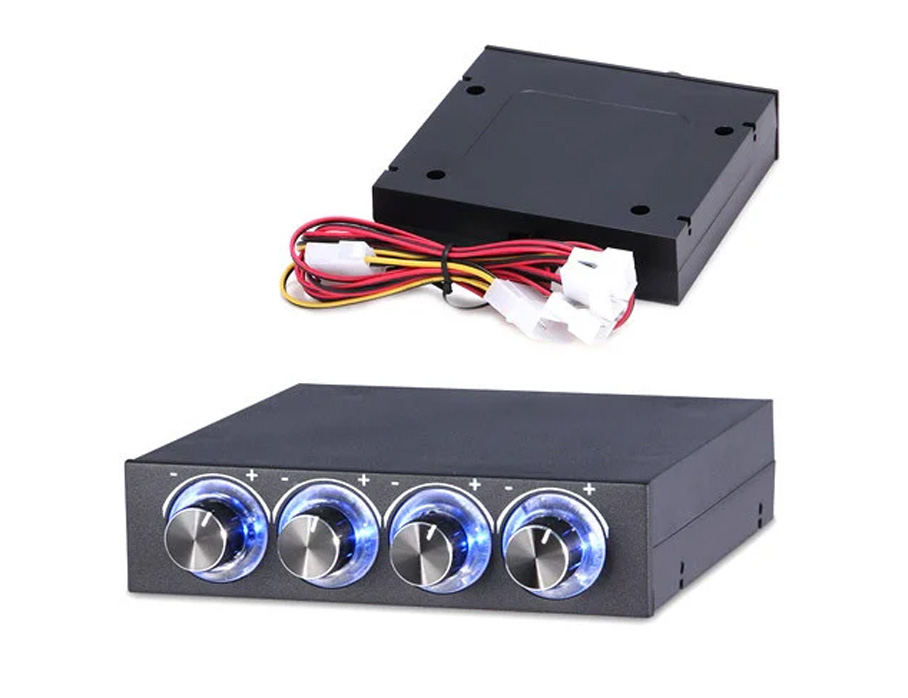
Mechanical rheobus does not have such disadvantages, you can adjust each fan individually as you wish, but you will have to keep the temperature sensor constantly open, which is not very convenient. This model, as in the photo, does not have its own screen, which limits its capabilities.
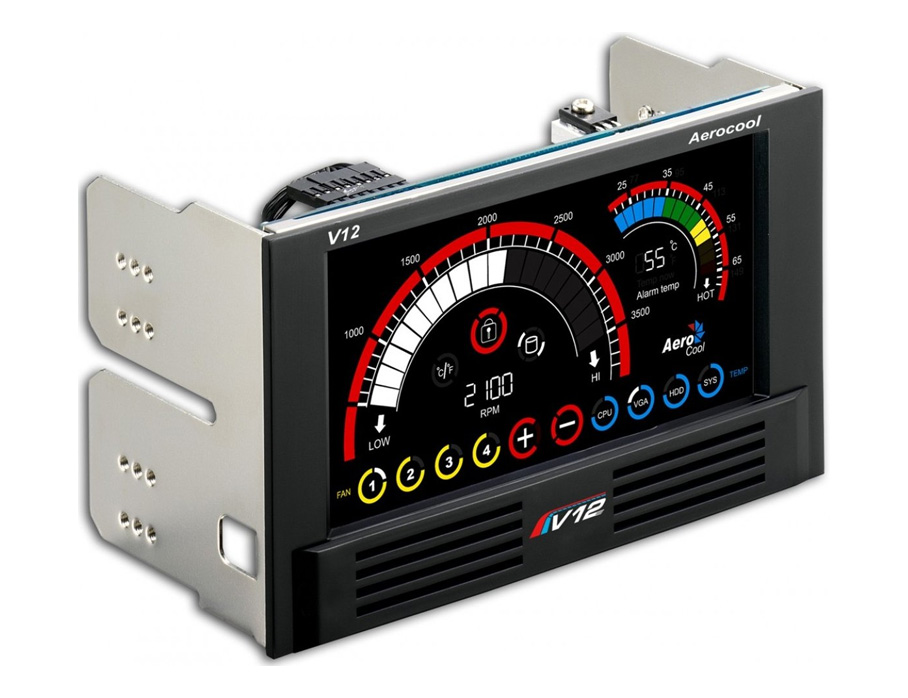
Electronic rheobus has a screen and displays all the necessary information on it, through the touch panel you can easily adjust the fan speed.
In fact, a rheobus is more of a decorative element and has no practical application. Modern boards themselves regulate the speed of all fans depending on the temperature on the modules of the case. But if you want to install one of them, they are mounted in a hole for 3.5” devices, which is most often a DVD-ROM. Note that on modern gaming cases such a hole is often missing.
Replacing the cooling of a graphics card
If you have problems with the radiator, there is no simple solution. All cooling systems for graphics cards vary depending on the model and performance. You will have to look for exactly the same radiator, and it is most profitable to order it in the brand service center or look for it at dismantling services. Most often, coolers and radiators are the most valuable things you can pull from a burned card, so the price will not be very high.
When you have a new radiator in your hands, proceed to the replacement.
How to replace the radiator on a graphics card
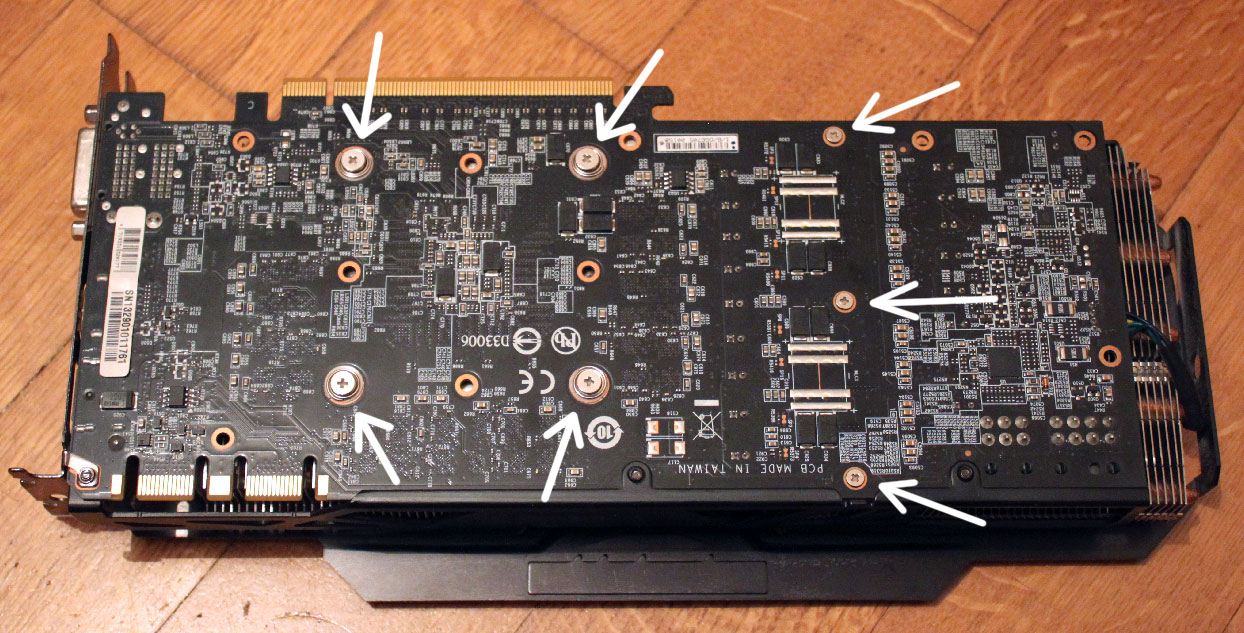
Disconnect all cables from the graphics card and remove it from the case. Unscrew all screws from the top side of the board.
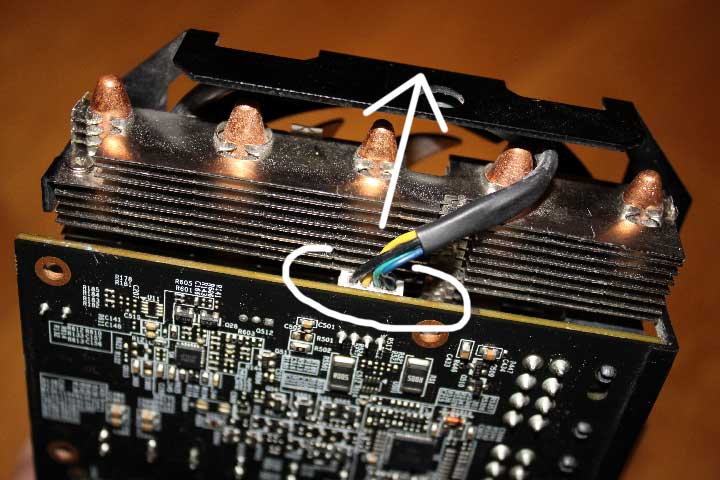
Then you need to disconnect the power cable. Fortunately, the manufacturer thought of us and made a connector, not soldered the wires directly.
Important! The graphics card heats up a lot during operation, and the thermal paste does not always withstand such loads. In a damaged state, the paste turns into a stone and can glue the radiator to the chip. Do not jerk and make sudden movements, try to gently loosen the radiator, trying to find a weak spot. Only this way can you remove the radiator from an already used card.
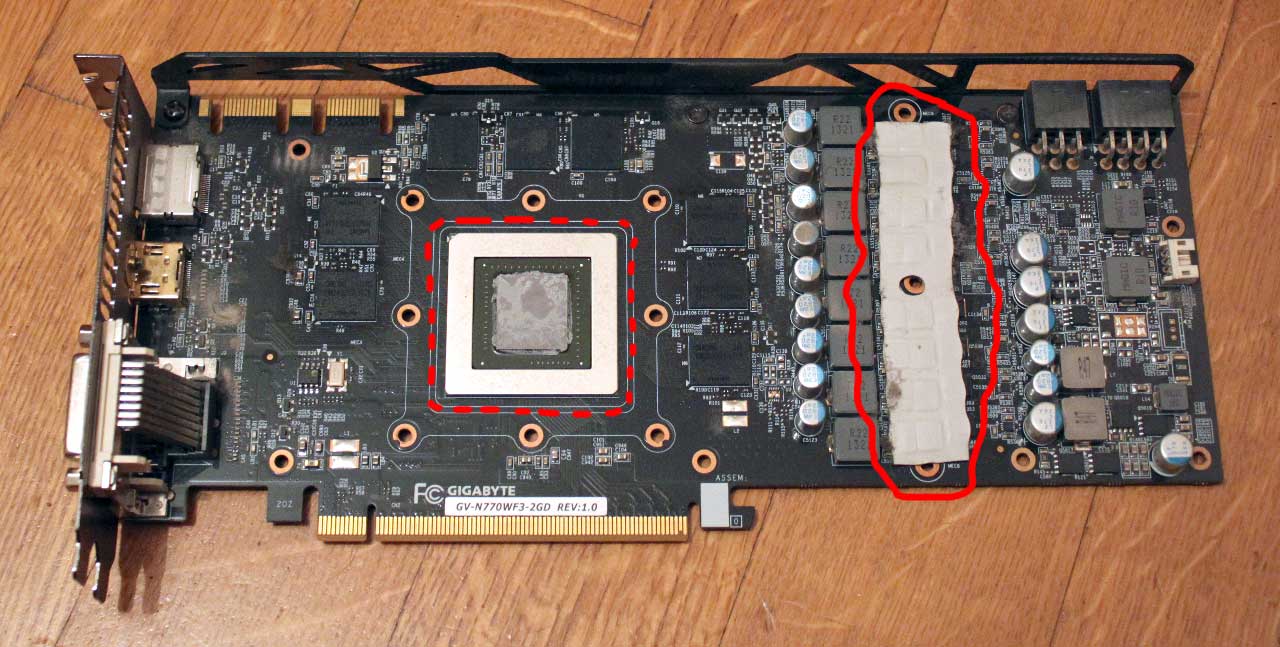
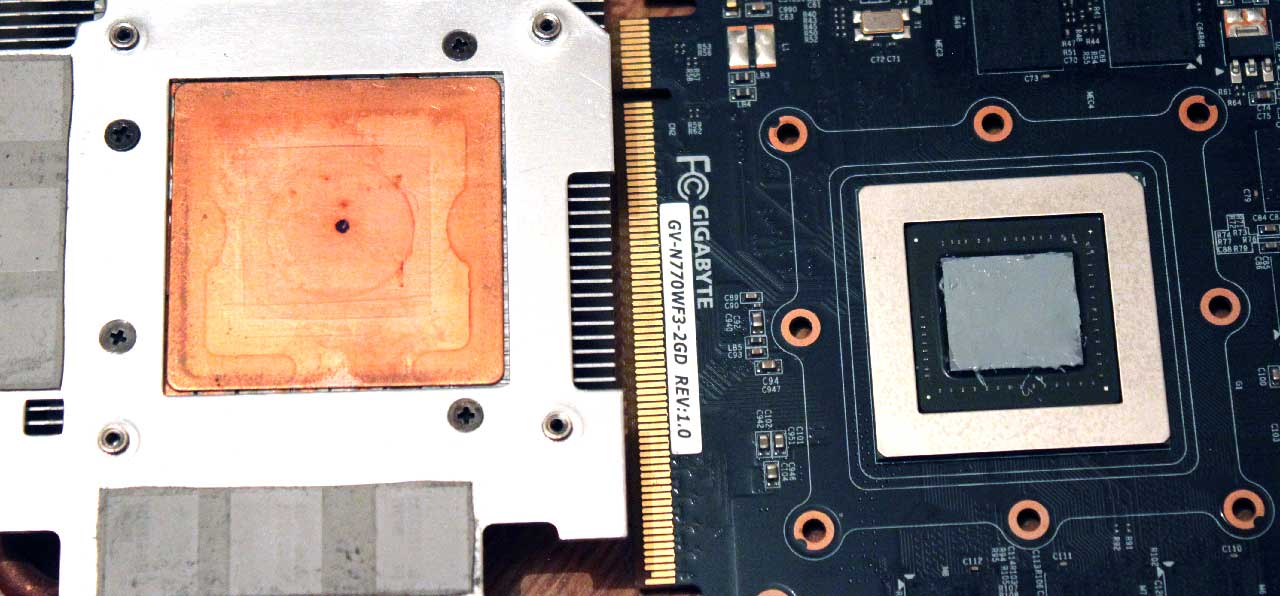
Now you need to clean everything well from the old thermal paste. Use only plastic tools and alcohol - the chip should remain undamaged, even a small scratch can affect its performance. Do not use water-based cleaning solutions, only those that can be used to clean boards. Water on the tracks after a few weeks or months will lead to oxidation, and you will have to replace the graphics card.
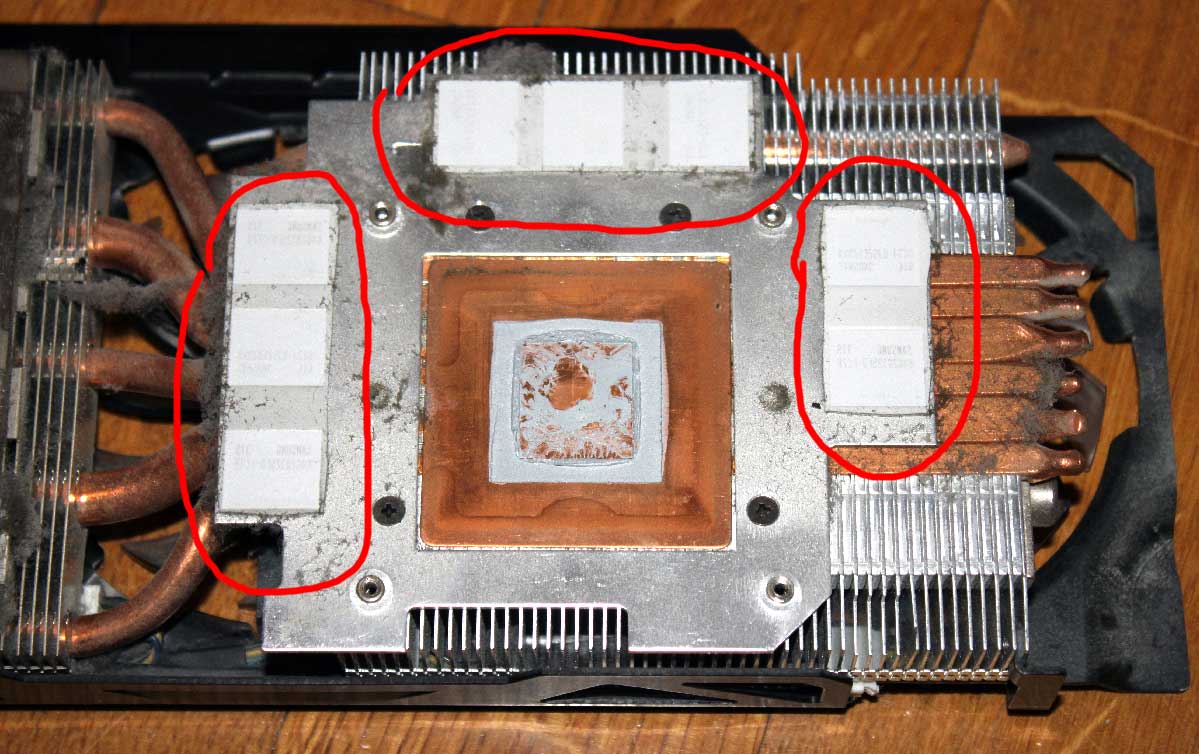
Some areas are not smeared with thermal paste, in particular, this applies to memory chips with a plastic case. Special thermal pads are used for their cooling (in the photo). Do not use the old ones, you must buy new ones, only then will you ensure reliable heat dissipation.
The next task is to grease the chip with thermal paste. Do not skimp on such an important element. In the first few days, even the cheapest thermal paste will show excellent results. But after a few weeks, or at best after a month, it will dry out, and the card will start to overheat. Quality pastes do not dry out for a long time and have maximum thermal conductivity.
It is also worth mentioning the now obsolete KPТ-8, a Soviet thermal paste. Never use it for modern electronics. It was designed for completely different tasks and chips of a completely different size. The cost of modern specialized thermal pastes is not that high to risk overheating due to using KPТ-8.
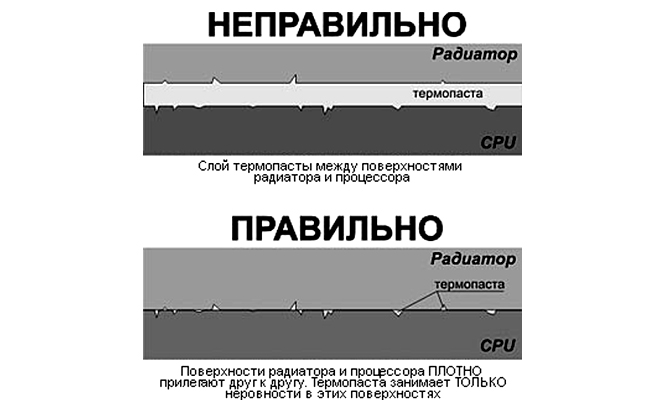
Apply the thermal paste in the thinnest layer you can. The picture shows how the joint area should look in section. If you are doing this for the first time, squeeze a drop the size of half a match head onto the graphics card chip and carefully spread it with a plastic card, a small plastic spatula, or just your finger, previously wrapped in cling film or a plastic bag.
After these operations, you can install the new radiator in place and lightly press it. There are always springs at the mounting points that will not allow you to over-tighten and crush the chip. Remember that the screws should not be tightened to the end, but only until the radiator fits snugly against the chips.
Replacing the cooler on the graphics card
Unlike case coolers, the graphics card has a decorative plastic cover on which the coolers are already placed. Replacing each one separately is quite difficult, different manufacturers use different types of mounts and different bearings, you need to look at each specific case separately.
Some manufacturers, such as MSI, try to install separate coolers that are attached to the radiator with three screws. It is very easy to replace them: unscrew the old fan and disconnect it, then screw on the new one and connect it in place of the old one. Unlike the radiator, there is no need for thermal paste or other sophistications, everything is as simple as possible.
The only difficulty may arise if the manufacturer has paralleled two fans to one connector. In this case, you will have to solder the wires. This is not a difficult task, you just need to follow the pinout. Considering that you will have a new cooler with a ready input, there should be no difficulties with this, the main thing when soldering is to connect the wires in order. Be sure to insulate the soldering points, in case of a short circuit something might burn out even before the protection turns on, if it turns on at all and is provided by your manufacturer.
Replacing the plastic cover along with all the coolers is much easier. You just need to unscrew the old plastic shield and screw on the new one in its place.
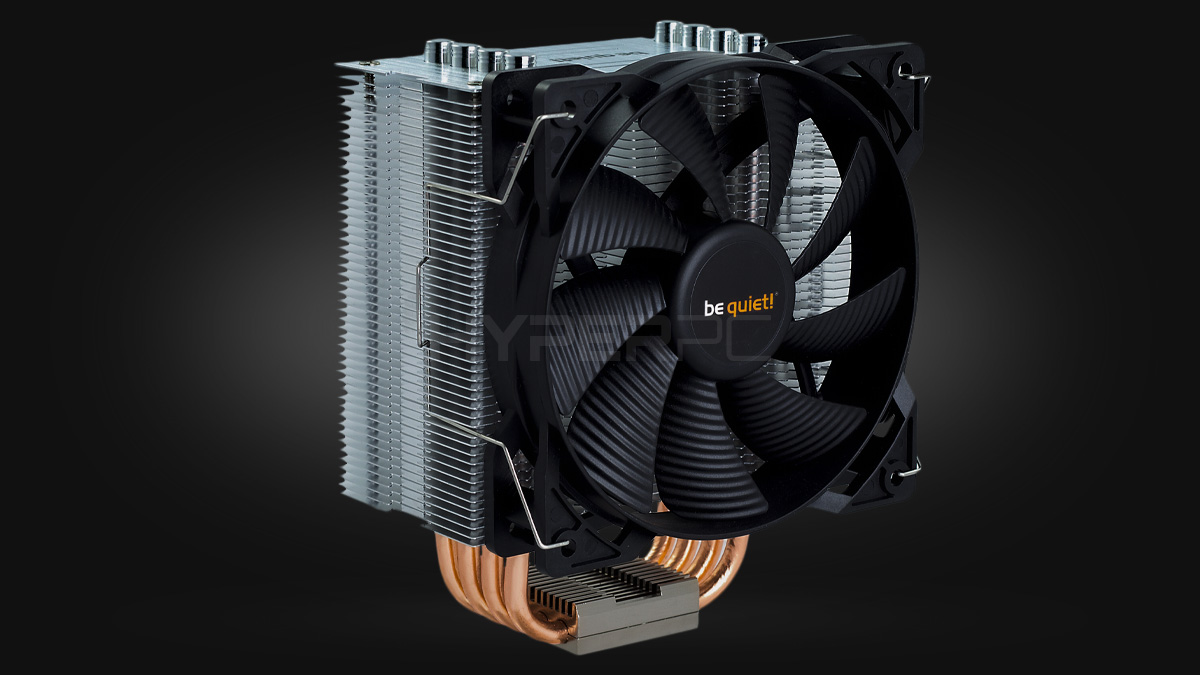
How to properly install a tower-type radiator on the processor
Almost all modern air cooling models for processors are tower radiators (in the photo). Other models with direct airflow towards the motherboard are used only on very weak CPU models. Any more or less powerful processor requires a tower-type radiator.
Let's start by removing the motherboard from the case and disconnecting all devices from it, removing all modules (RAM, SSD, etc.).
Disconnect the cooler of the existing cooling and the further instruction will slightly differ for Intel and AMD processors.

AMD
Remove the old radiator by detaching the quick-release clip. This can be done by turning the eccentric clamp. Then you need to remove the thermal paste and apply a new one (the technology is described above). As a result, the thermal paste should only fill microcracks, not be a layer between two metal surfaces. Note that many radiators already have thermal paste applied from the factory, in which case you do not need to apply a new one.
A regular cooler is attached with the same clip with an eccentric or hook. Just install it in place and clamp it with the quick-release mechanism.
Then you need to connect the fan to the motherboard through a 4 PIN connector and the installation of the tower-type radiator is complete.
INTEL
You can remove the old radiator by turning the quick-release fasteners with latches counterclockwise. Then comes cleaning the old thermal paste and applying a new one.
You need to screw the mounts with latching legs to the new cooler. Screw them from below, otherwise, the legs will not reach the motherboard.
After you have equipped the new radiator with mounts, you need to put it in place of the old one, snap the plastic legs into the mounting slots and turn the blocker clockwise.
Connect the cooler to the motherboard and you're done, nothing needs to be configured.
How to Properly Install a Cooler on a Motherboard
It only makes sense to install a heatsink on the motherboard itself for the power supply chain; sometimes the manufacturer even installs cooling where the bridges can overheat.
If you actively use the CPU overclocking feature, the power supply chains (MOSFETs) may overheat. In this case, it is necessary to install heatsinks or a system of heatsinks with coolers there.
 The Simplest
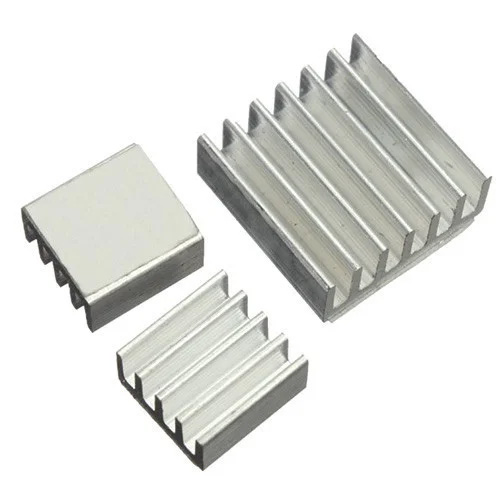 Very Basic
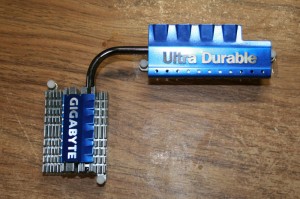 Stylish
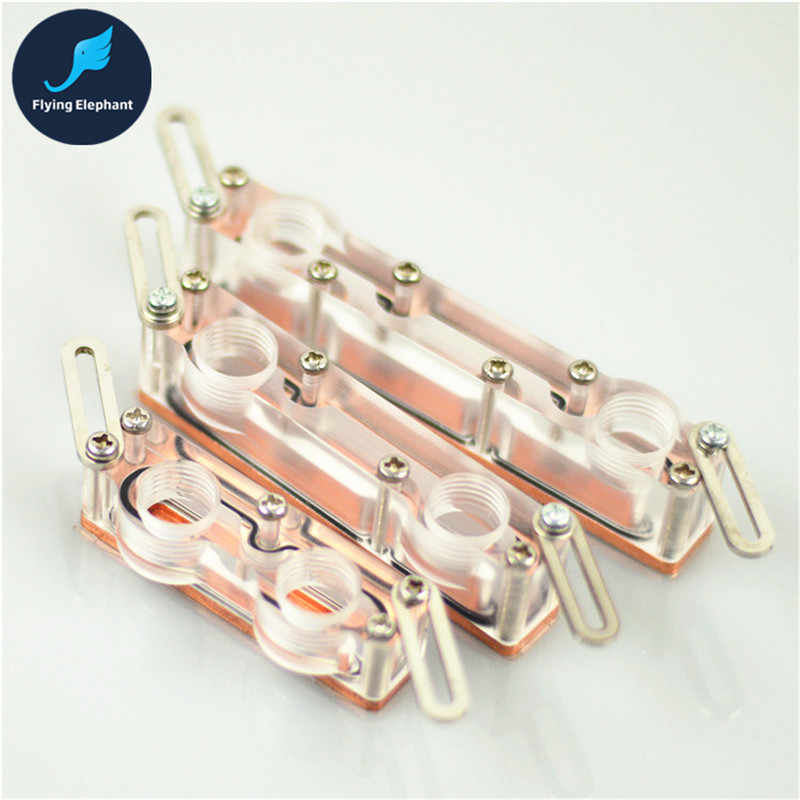 For Water Cooling Systems
 Heavy Artillery
As you can see, there is a wide selection. But do you need this? MOSFETs or the power supply chain are calculated along with other motherboard components for the processor models it supports.
Usually, motherboards designed for overclocking are released with the necessary number of heatsinks, most often styled so as not to spoil the aesthetic look.
If you are mercilessly overclocking your processor, and at the same time the motherboard is overheating, heatsinks on these transistors alone will not suffice.
If you still decide to install a heatsink on the motherboard, the only way to do it against the manufacturer's recommendations is to glue the heatsink with a thermal adhesive pad or using special thermal glue.
Mounting points for water cooling system heatsinks should be provided on the motherboard itself.
Laptop Cooling Replacement
To get to the heatsink with the fan, you need to completely disassemble your laptop. How to do this can be found through a search engine. Each laptop model is disassembled differently and no universal recommendations can be given. In any case, you will need a Phillips screwdriver and a small plastic spatula to detach the snaps on the case.
If you need to replace the entire cooling system, again, there are no universal systems. You need one specifically for your model, otherwise it simply won't fit. If the laptop has a discrete graphics card, then it likely has a single copper tube that removes heat from the graphic chip and the processor. You cannot replicate its special bend; this is quite difficult, especially considering the need to solder the heat sink.
How to Properly Install Water Cooling
Installing a custom water cooling system in your computer is not an easy task, you'll need to put in effort and delve into the material.
Components of a Liquid Cooling System
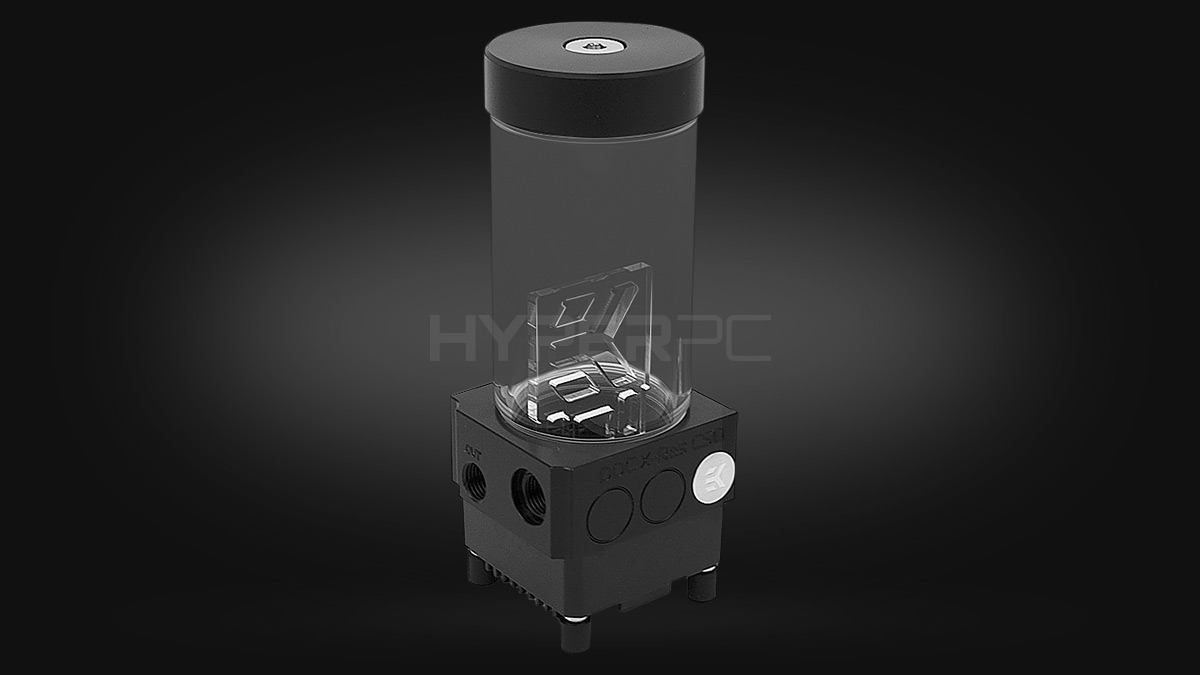
Pump. Most often comes assembled with a small reservoir, which lights up and bubbles during operation, making it look very attractive. The pump is needed to circulate the liquid through the tubes, absorbing heat from the water block and releasing it into the radiator.
Water Block. This is a copper plate with a small reservoir through which liquid is circulated. It is installed on a graphics card or processor, depending on the purpose, and serves to transfer heat into the water.
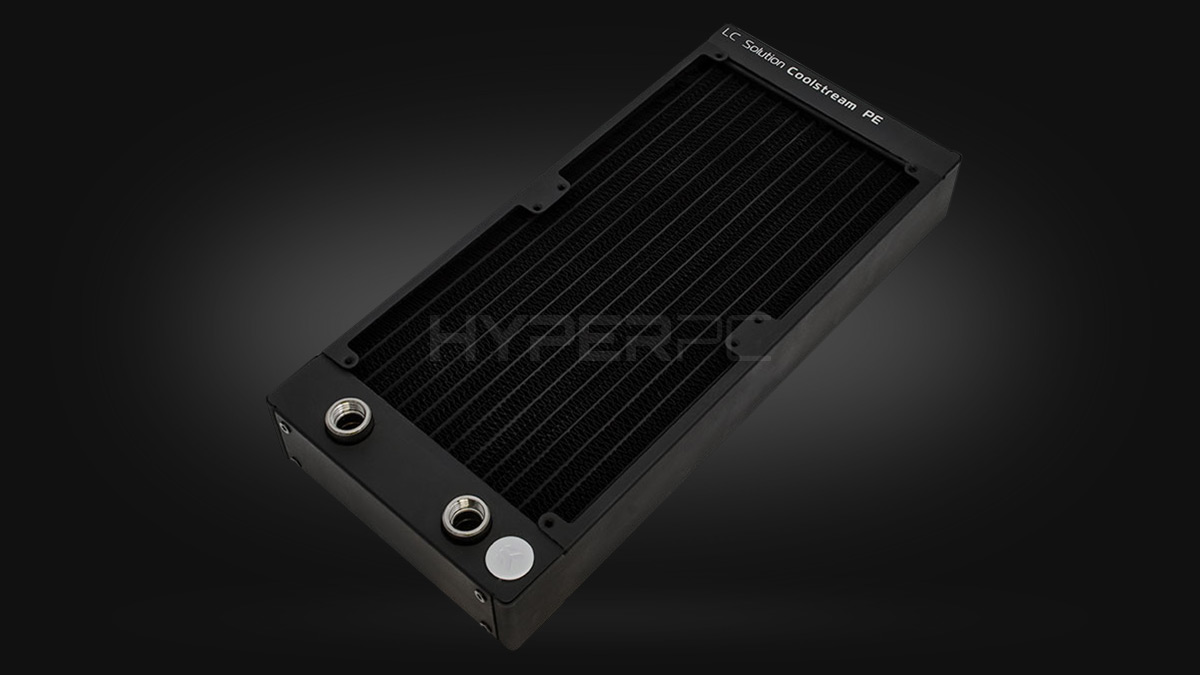
Radiator. Necessary for dissipating heat into the atmosphere, it is equipped with fans for blowing.
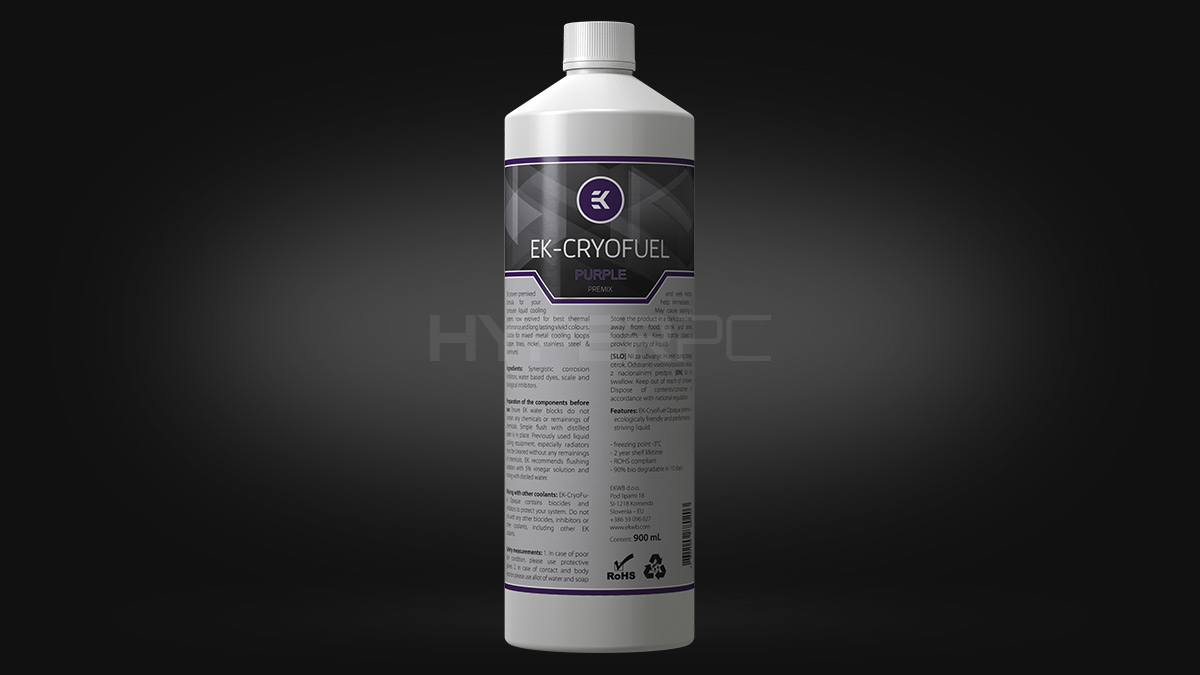
Coolant. This fluid has an increased heat transfer capacity. You can use distilled water, but it's better to use special compounds for such systems. Additionally, they can be colored, giving your custom water cooling system a unique appearance.
Tubes, Hoses, and Fittings. They can be flexible silicone or rigid acrylic. Rigid ones are harder to install and require fittings for bends.
Assembling a Water Cooling System
It's all very individual and depends on the case and choice of decorative elements, the number of water blocks, and the placement of the pump and reservoir.
The essence of the installation is to assemble everything into a single system, through which the pump will circulate water, ensuring that after all the hot points, the liquid enters the radiator for cooling.